
The Problem
You want a squeeze page: a page with one job, getting a visitor’s email address in exchange for something free, like a checklist, guide or discount. The best ones have no menu, no sidebar and no footer links, just a headline, a picture of the freebie and a short form.
If you embed a Gravity Forms form on a normal WordPress page, your theme wraps it in the header, navigation and footer, which gives visitors a dozen ways to leave. Removing those usually means a landing page plugin, a page builder or a custom page template.
The Solution
Use the Conversational Forms Add-On. It gives a form its own full-screen page at its own URL, without your theme’s header, menu or footer. You add a logo, a picture of your freebie, a headline and a button, and the form asks one short question at a time. That’s the whole squeeze page, built from form settings.
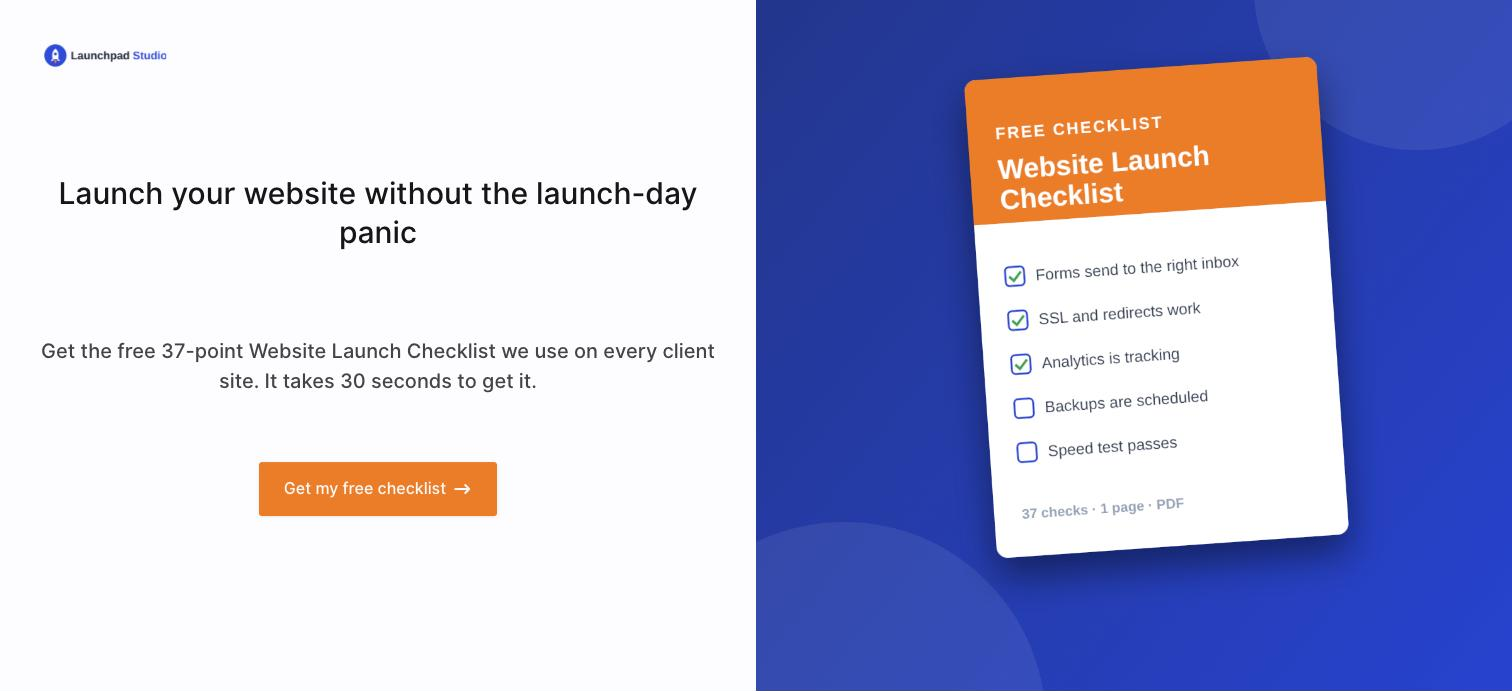
Tested on Gravity Forms 3.2 with Conversational Forms 1.8.0.
What You Need
- A Gravity Forms Elite license, since Conversational Forms is an Elite add-on. Install it from Forms → Add-Ons.
- Your freebie (the “lead magnet”), uploaded to the Media Library. Ours is a one-page PDF checklist.
- An image of the freebie for the side of the page. A tall image works best with the split layout; ours is 1200 × 1500 pixels.
- Optional: an email marketing add-on such as Mailchimp, Kit or ActiveCampaign to add subscribers to your list.
Step 1: Build a Short Opt-In Form
Each field becomes one screen, so keep it to a few questions. Ours has four:
| Field | Label | Why |
|---|---|---|
| Single Line Text | What’s your first name? | Lets you greet people by name on the thank-you screen and in emails |
| Where should we send your checklist? | The only field you truly need. Add a short “no spam” description below it | |
| Radio Buttons | Where are you with your website? | One qualifying question tells you who signed up, so you can follow up better |
| Consent | Email updates | A clear opt-in for marketing emails, saved with the entry (helpful for GDPR) |
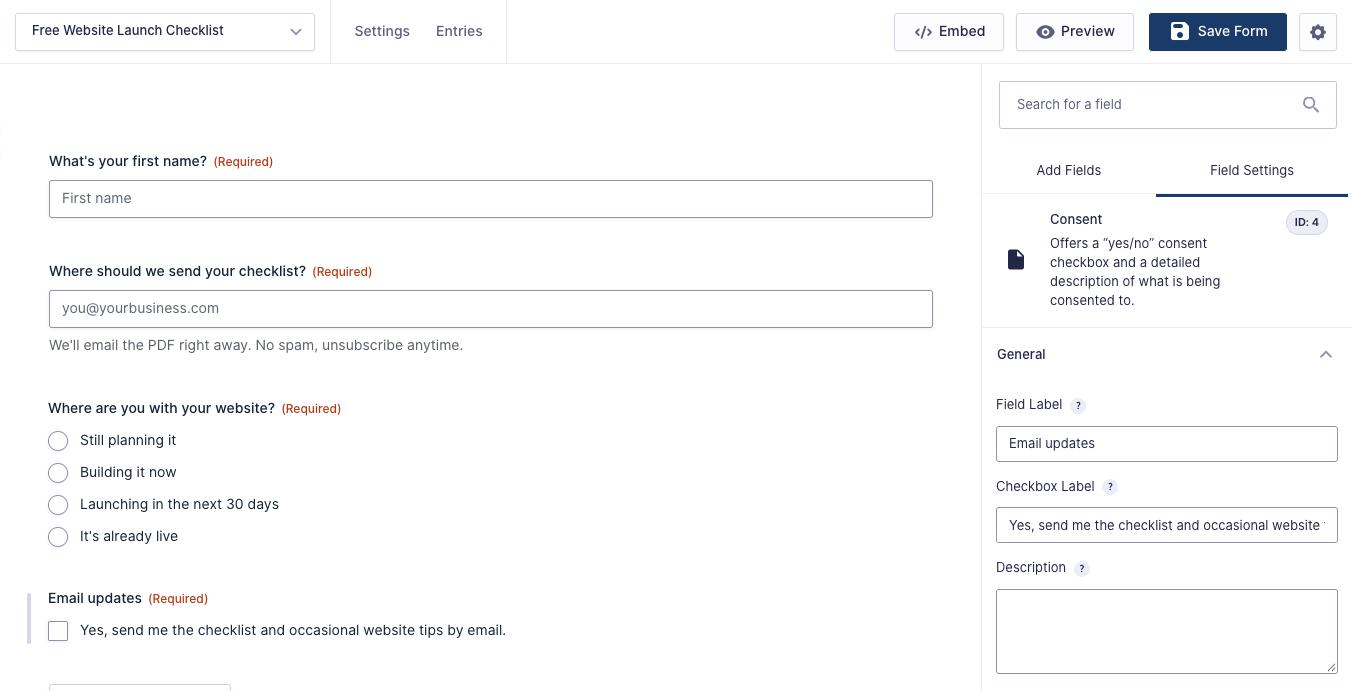
Change the submit button text under Settings → Form Settings → Form Button to something specific, like “Send me the checklist”. On a conversational page it shows on the last question.
Step 2: Deliver the Freebie
Give people the freebie two ways, so a typo in the email address doesn’t lose them.
On the thank-you screen. In Settings → Confirmations, use a Text confirmation with a download link. The gform-theme-button class makes the link look like a Gravity Forms button in your accent color:
<h2>You're in, {What's your first name?:1}!</h2>
<p>Your checklist is on its way to {Where should we send your checklist?:2}. Can't wait? Download it now:</p>
<p><a class="gform-theme-button" href="https://yoursite.com/wp-content/uploads/website-launch-checklist.pdf" target="_blank">Download the checklist (PDF)</a></p>
Swap in your own merge tags (use the merge tag picker) and the file URL from the Media Library.
By email. In Settings → Notifications, add a notification that sends to the Email field, with the download link in the message. Keep a second notification for yourself if you want to know about each sign-up.
Step 3: Turn On the Conversational Page
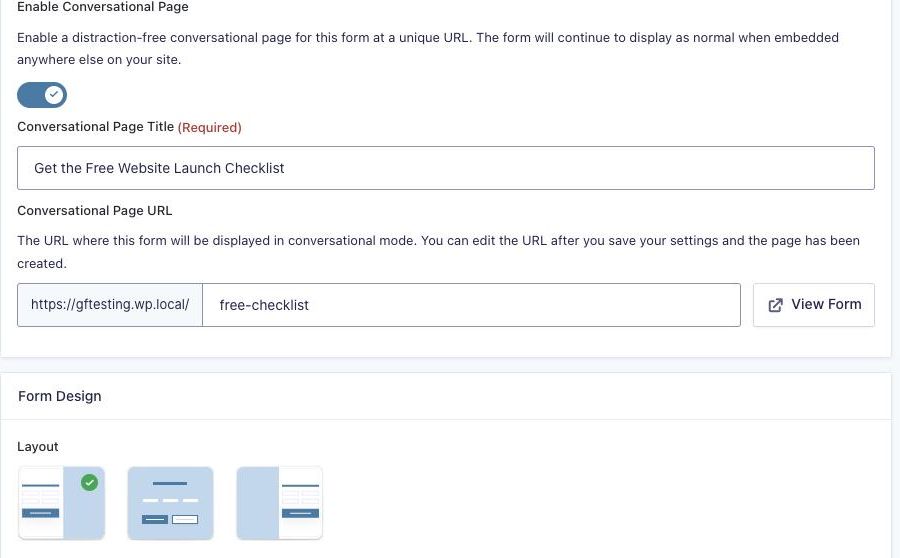
Go to the form’s Settings → Conversational Forms, turn on Enable Conversational Page, enter a Conversational Page Title (it’s used as the browser tab title) and save. After the first save you can edit the Conversational Page URL. Make it short, like /free-checklist/, because you’ll be putting it in ads, emails and social posts.
Step 4: Make It Look Like a Squeeze Page
All of this is in the Form Design section of the same settings page:
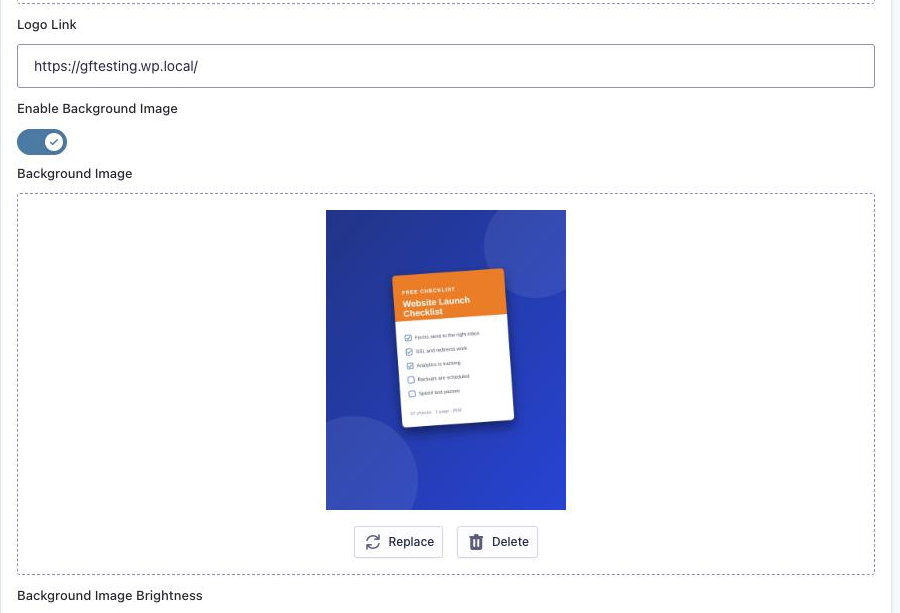
- Layout: choose Left Aligned (or Right Aligned). The form takes one half of the screen and your background image fills the other half, like a classic split-screen opt-in page. Center puts the form in the middle of the page.
- Background Image: turn on Enable Background Image and upload the picture of your freebie.
- Background Image Brightness: 100% shows the image as is. Lower values darken it, which helps when text sits on top of the image.
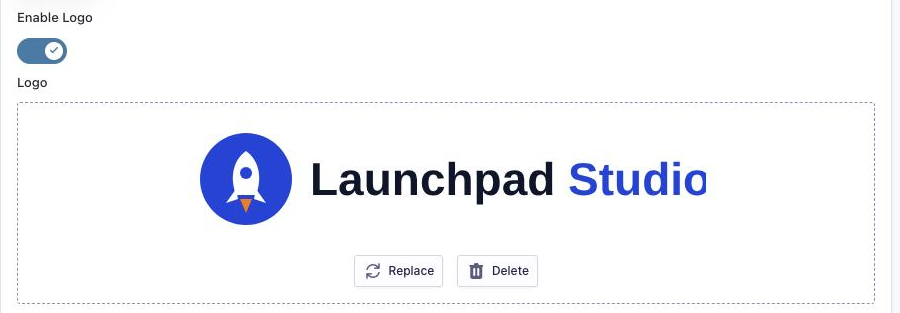
- Logo: turn on Enable Logo, upload your logo, and set the Logo Link (or leave it empty if you don’t want an exit).
- Form Accent Color: your call-to-action color. It colors the buttons and progress bar. Input Accent Color colors the radio dots and checkmarks.
Step 5: Write the Welcome Screen
The welcome screen is your above-the-fold pitch. Turn on Enable Welcome Screen and fill in:
- Heading: the result they want, not the name of the freebie. Ours: “Launch your website without the launch-day panic”.
- Description: what they get and how quick it is. Ours: “Get the free 37-point Website Launch Checklist we use on every client site. It takes 30 seconds to get it.”
- Start Button Text: say what happens. “Get my free checklist” beats “Start”.
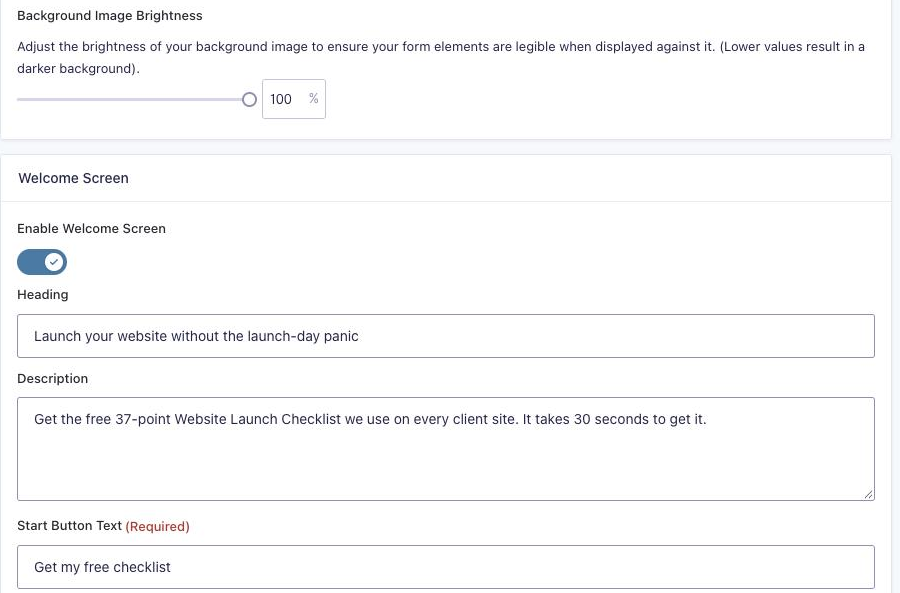
Under Buttons, we changed the Continue Button Text to “Next”, and under Footer turned on the progress bar with the Proportion type, so people see “1/4 Completed!” and know it’s short.
Step 6: Test It
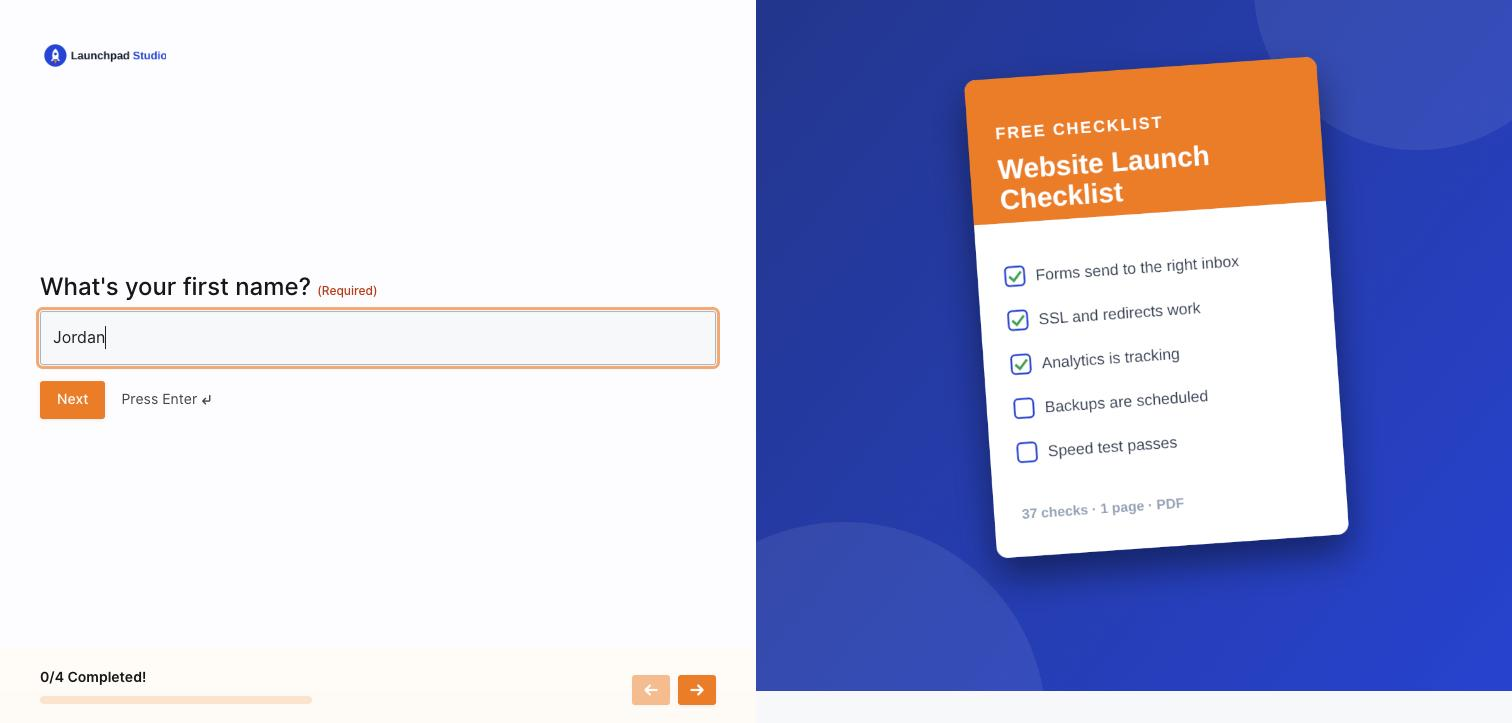
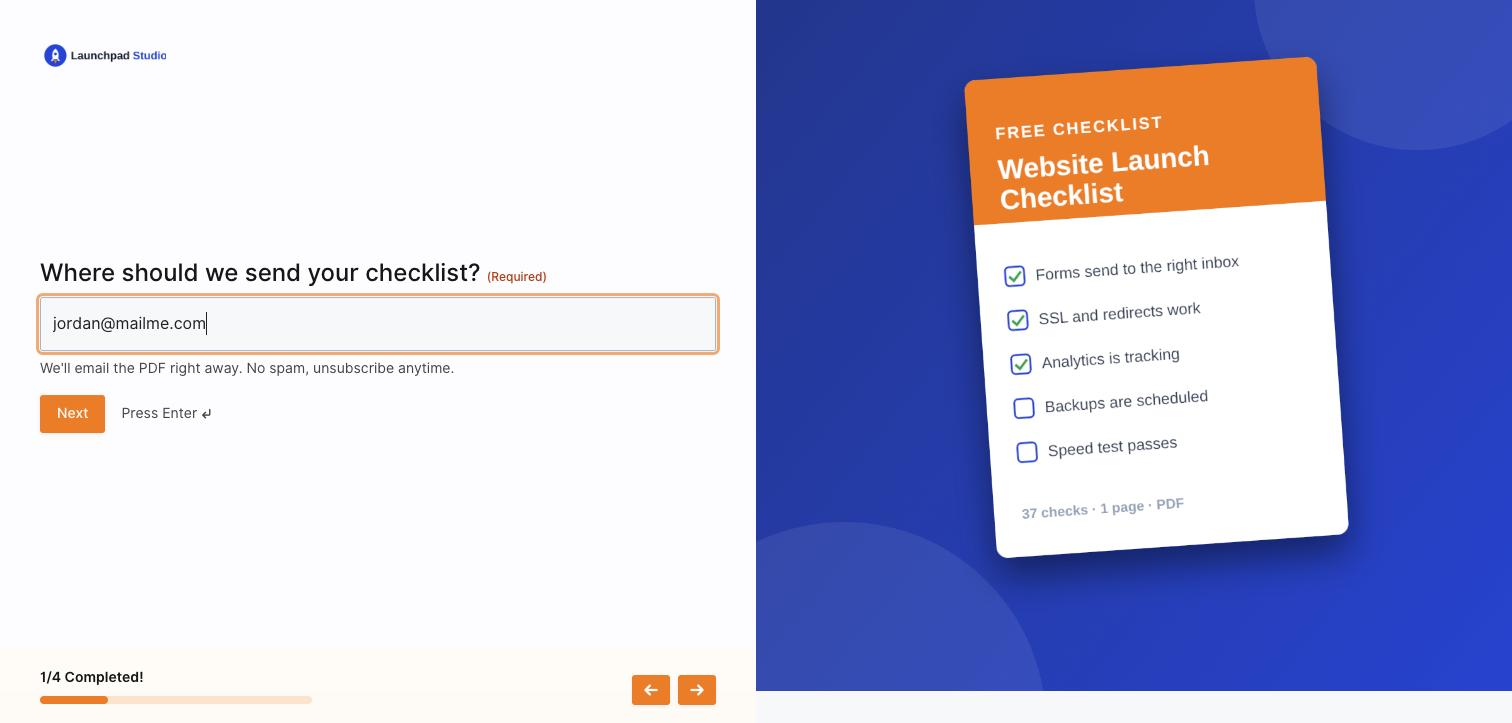
Click View Form next to the URL and go through it like a visitor. Each question gets its own screen; people click Next or press Enter to move on:
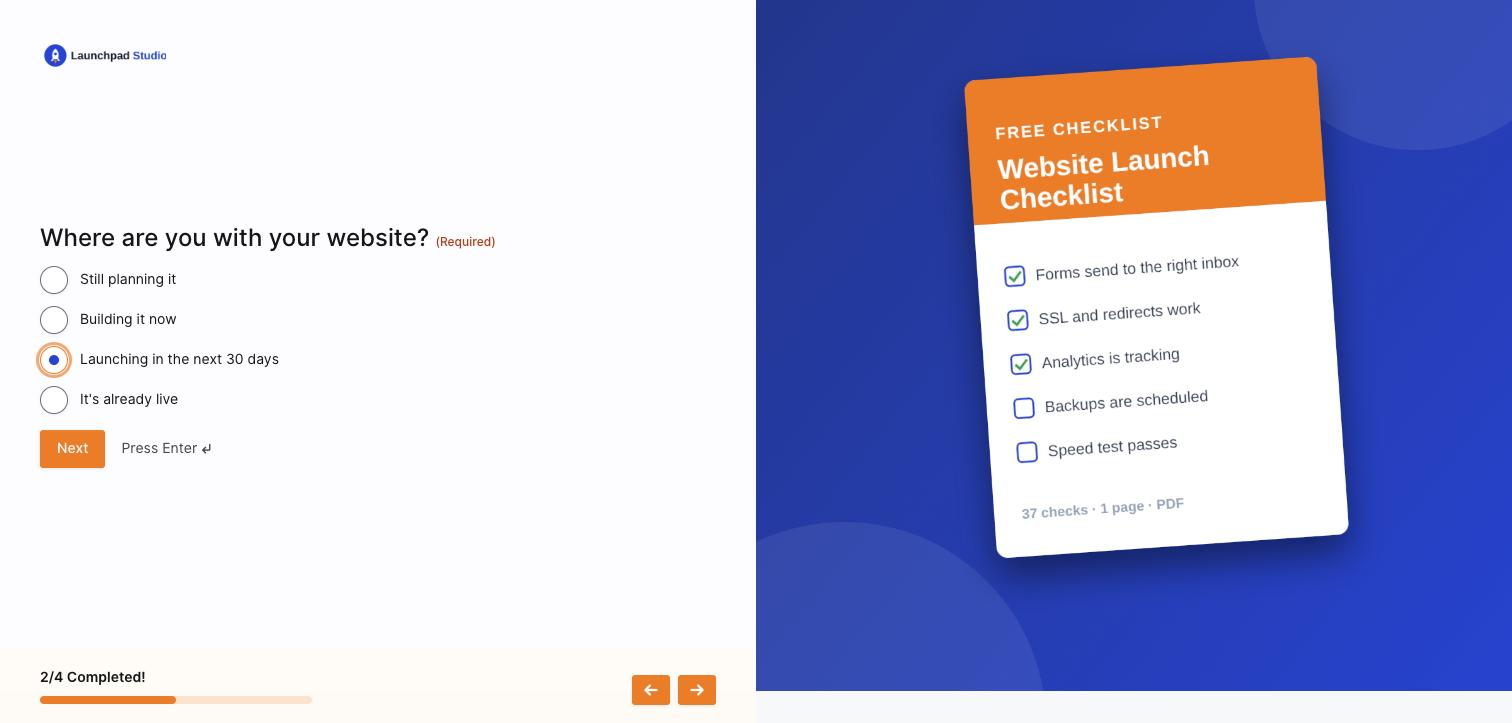
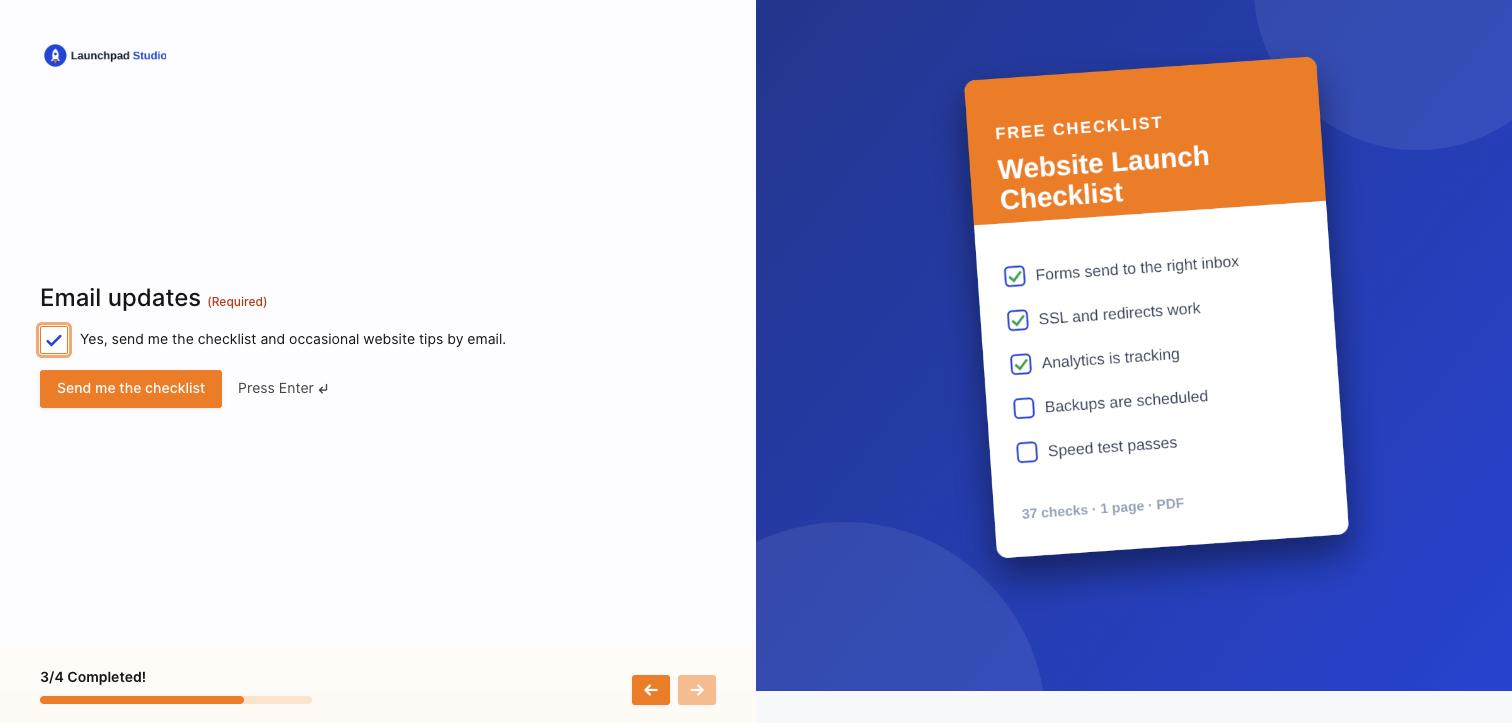
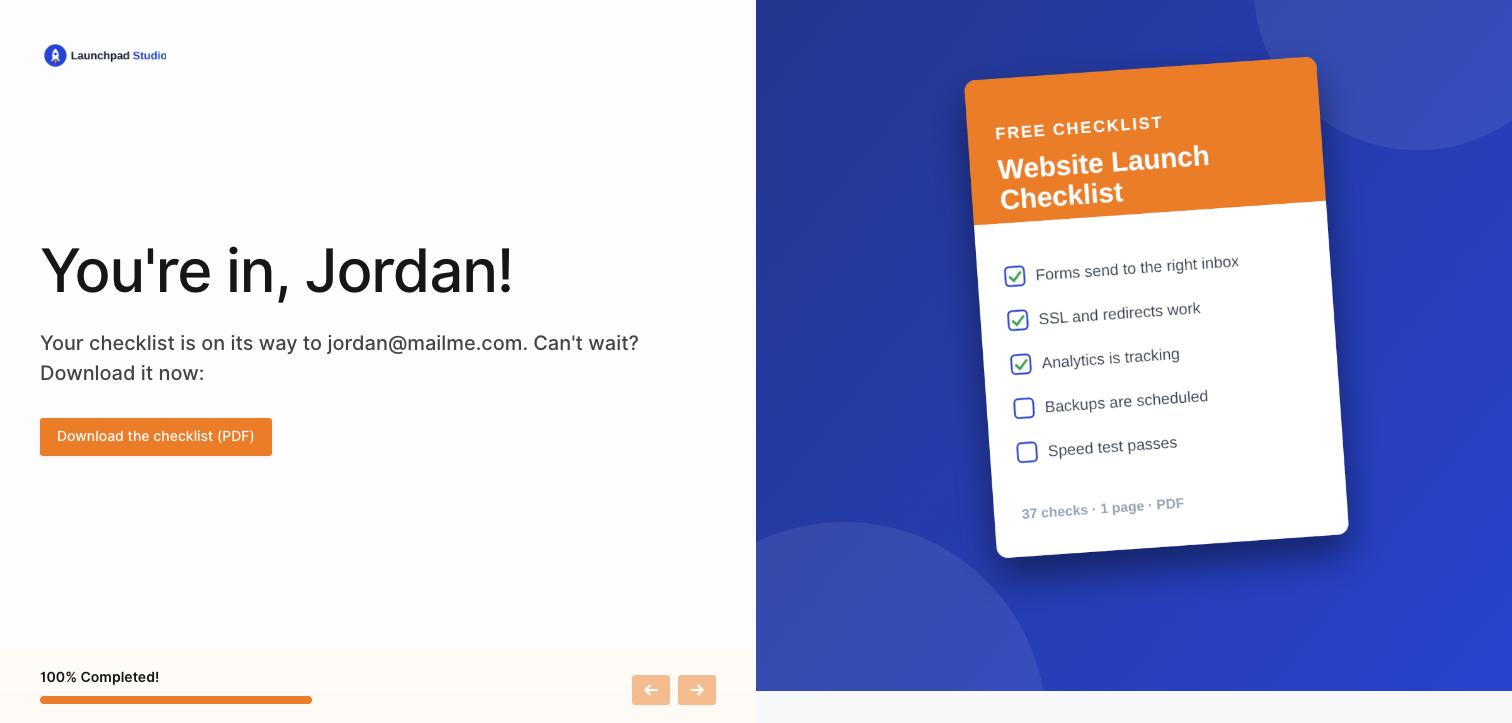
Check that the entry shows up under Forms → Entries and that the email with the download link arrives.
Step 7: Add Subscribers to Your Email List
If you use an email marketing service, install its Gravity Forms add-on and add a feed to this form (Settings → [your service]). Map the Email and first name fields, and use the feed’s conditional logic so people are only added when the consent box is ticked. You can also map the “Where are you with your website?” answer to a tag or custom field, then send different follow-ups to planners and people about to launch.
Download the Form Template
It’s free. Get the opt-in form from this tutorial as a Gravity Forms import file, ready to customize.
Things to Know
- The form still works as a normal form elsewhere. Embedding the same form on a page shows it with every field at once. Only the conversational URL is the squeeze page.
- The form title and description don’t show on the conversational page. Put your pitch on the welcome screen.
- No CAPTCHA field. The Conversational Forms docs list it (including invisible reCAPTCHA and Turnstile placed as a field) as unsupported, so use the honeypot and an anti-spam add-on like Akismet.
- Labels are always on top, and CSS Ready Classes such as two columns don’t apply.
- Track where sign-ups come from. Add UTM parameters to the links you share; see conversion tracking for Gravity Forms.
Frequently Asked Questions
What is a squeeze page?
A squeeze page is a short, single-purpose landing page that asks for a visitor’s email address in exchange for something free, like a checklist, guide or discount. It has no menu or other links, so the only thing to do is sign up.
Can I make a squeeze page with Gravity Forms without a page builder?
Yes. The Conversational Forms Add-On gives a form its own full-screen page at a custom URL with no theme header, menu or footer. Add a logo, a background image of your freebie and a welcome screen with your headline, and the form becomes the squeeze page.
Which Gravity Forms license do I need for Conversational Forms?
Elite. Conversational Forms is one of the Elite-only official add-ons. The email marketing add-ons, like Mailchimp and Kit, are available on every license.
How do I deliver a lead magnet with Gravity Forms?
Upload the file to the Media Library, then link to it twice: in the confirmation message, so people can download it right away, and in a notification sent to the Email field, so they have it in their inbox too.
Can I send squeeze page sign-ups to Mailchimp or Kit?
Yes. Install the Gravity Forms add-on for your email service, add a feed to the opt-in form, map the email and name fields, and add a condition so people are only subscribed when they tick the consent box.
Related Articles
- Build a SurveyMonkey-Style Survey in Gravity Forms
- Gravity Forms Conversational Forms Add-On
- A/B Split Test Conversational Forms vs Normal Forms in Gravity Forms
- Okay, let’s talk about pop-ups
- WordPress Conversion Tracking for Gravity Forms
Need More Help?
If you still need help, use the chat or leave a comment below and we’ll get back to you.
Comments