
Copying form submissions into Notion by hand gets old fast. The new Notion Add-On from Gravity Labs does it for you: each entry can become a row in a Notion database, a new page under a page you choose, or both. You map form fields to your database columns, or write the page as markdown with merge tags, and Gravity Forms sends it to Notion when the form is submitted.
Tested November 2026 with version 0.1.0-alpha.2 on a test site, with Gravity Forms 3.2.1 and a real Notion workspace. I built a project inquiry form, sent every entry to a “Website Leads” database, and had a second feed write a project brief page for website design inquiries. Every screenshot below comes from that site and that Notion workspace.
What It Does
- Database row. Each entry becomes a new row in a Notion database. You pick the database from a list and map fields to its columns: text, email, phone, URL, number, date, checkbox, select, multi-select and status.
- Child page. Each entry becomes a new page under a Notion page you choose. You write the title and the body with merge tags, and the body can use markdown: headings, bold text, lists, to-do checkboxes, quotes and dividers.
- Workspace page. The same, but the page goes at the top level of the workspace instead of under a parent page.
- Conditional logic on every feed, so a feed only runs when the entry matches your rules.
- Background sending. Feeds are queued and sent after the form is submitted, so the visitor doesn’t wait for Notion. If Notion rate-limits the site, the add-on waits as long as Notion asks and tries again.
- Errors on the entry. If Notion rejects something, the reason is added as a note on the entry.
- A Gravity Flow step. If you use Gravity Flow, there’s a Notion step, so you can send the entry after an approval instead of right away.
It needs WordPress 6.8, PHP 7.4 and Gravity Forms 2.9.24 or later, plus a Notion account where you can add a connection.
Why You Need a Notion Connection First
Notion only lets an app read or write the pages it has been given access to. So before Gravity Forms can add anything, you create a connection (Notion’s name for an integration) in Notion, give it a redirect address, and then approve it from your WordPress site. During that approval Notion asks which pages the connection can use. Anything you don’t share stays invisible to Gravity Forms.
This is the step people get stuck on: if a database doesn’t show up in the add-on later, it almost always means it wasn’t shared with the connection.
What You Need
- Gravity Forms 2.9.24 or later and the Notion Add-On from Gravity Labs.
- A Notion workspace where you can create a connection.
- A site on HTTPS. Notion rejects redirect addresses that aren’t HTTPS or that have a query string or IP address.
- A Notion database with the columns you want to fill, or a page to put new pages under.
Step 1: Connect Notion
Go to Forms → Settings → Notion. The top of the page shows the Redirect URI for your site (for most sites it’s your /wp-admin/admin.php address) with a Copy button.
- In Notion, create a new public connection, and paste the Redirect URI into its OAuth Domain & URIs settings.
- From the connection’s Configuration tab, copy the OAuth client ID and OAuth client secret, paste them into the add-on settings and save.
- Click Connect with Notion, choose the workspace, and pick the pages and databases the connection may use.
When you come back, the box says Successfully connected to Notion and shows the workspace name.
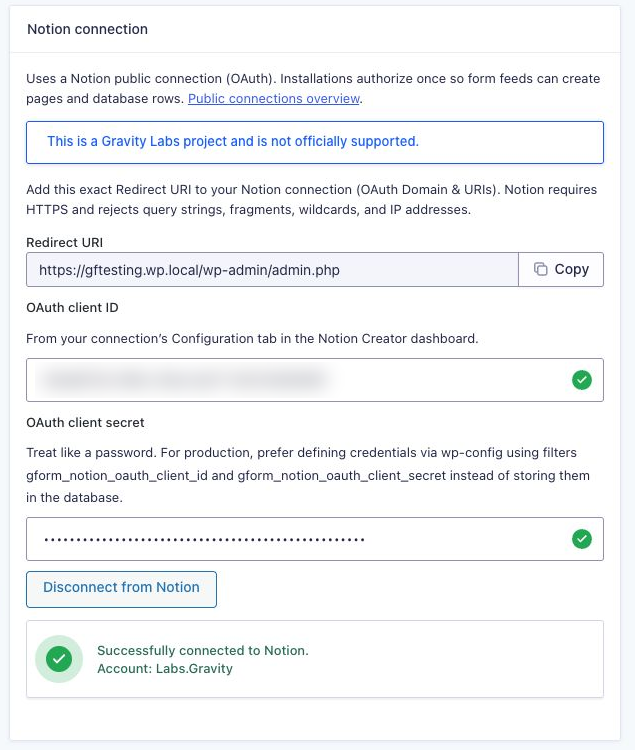
If you’d rather not keep the client secret in the database, the settings page suggests setting both values in code with the gform_notion_oauth_client_id and gform_notion_oauth_client_secret filters, for example from a small plugin or your wp-config.php setup.
Step 2: Build the Form
I used a project inquiry form with the kind of fields a small agency would ask for: name, email, phone, company, current website, a Service dropdown, a budget, checkboxes for what they need help with, an ideal start date, a newsletter consent checkbox and a message.
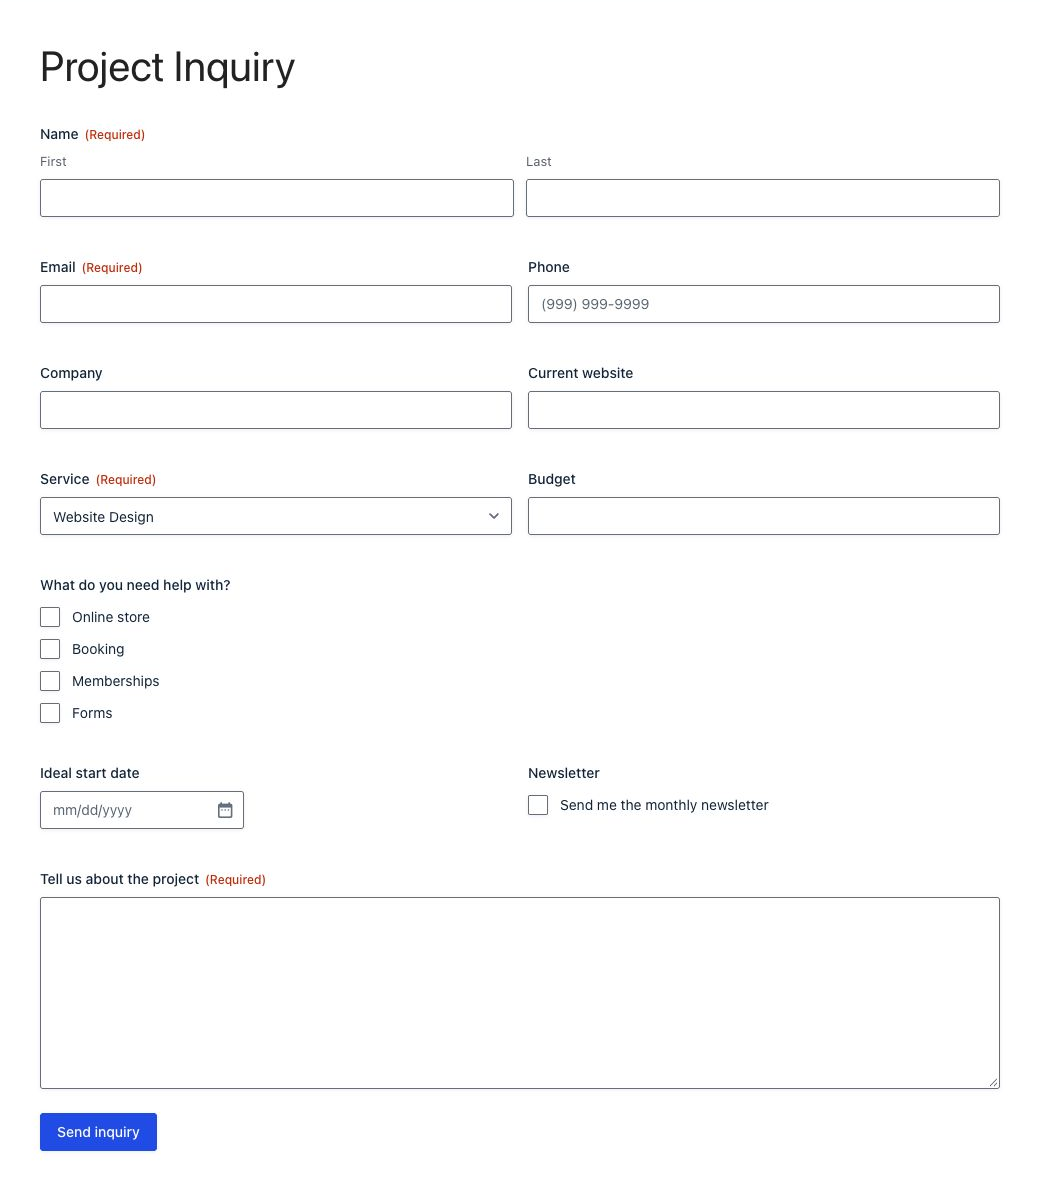
Before mapping, I created a matching Website Leads database in Notion with a Name title column, Email, Phone, Company, Website, Service (select), Topics (multi-select), Budget (number), Start Date, Newsletter (checkbox), Message, Status and Entry ID. Matching the Notion column types to the fields is what makes the data useful later: a real date column can be sorted and filtered, a text column with a date in it can’t.
Step 3: Send Each Entry to a Notion Database
Open the form, go to Settings → Notion and click Add New. Give the feed a name and set Destination to Database row.
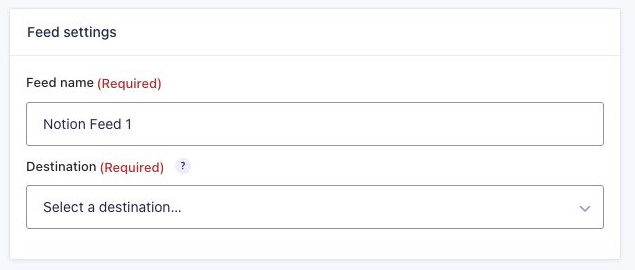
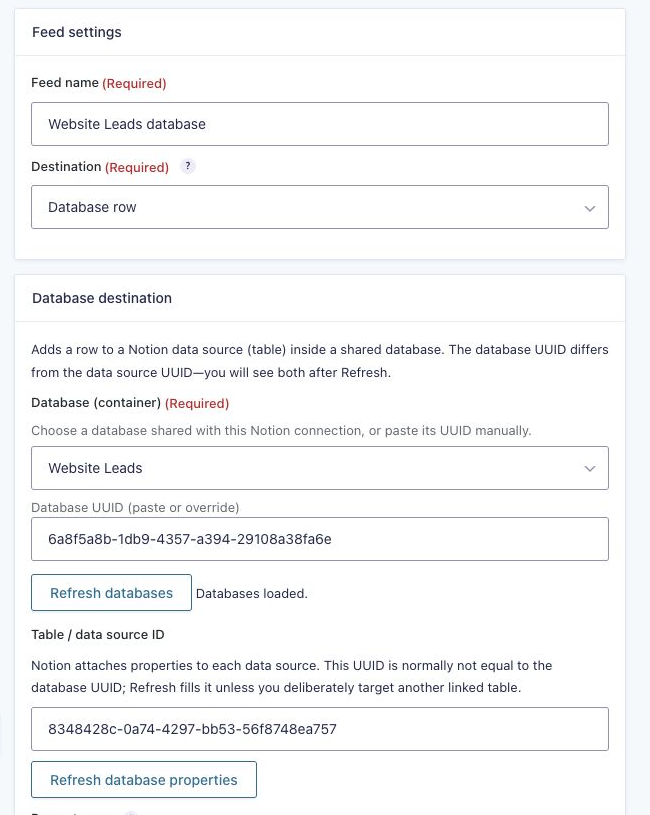
Pick the database from the Database (container) list. It shows every database shared with the connection; click Refresh databases if you just shared a new one. Then click Refresh database properties. That loads the columns and fills in the Table / data source ID for you.
Now map the columns in the Property map. The left side lists the Notion columns with their type in brackets, and the title column is marked required: Notion won’t create a row without it. The right side takes a form field, an entry property like Entry ID, or a custom value. I set Status to a fixed “Not started” so every new lead lands in the right column of a board view.
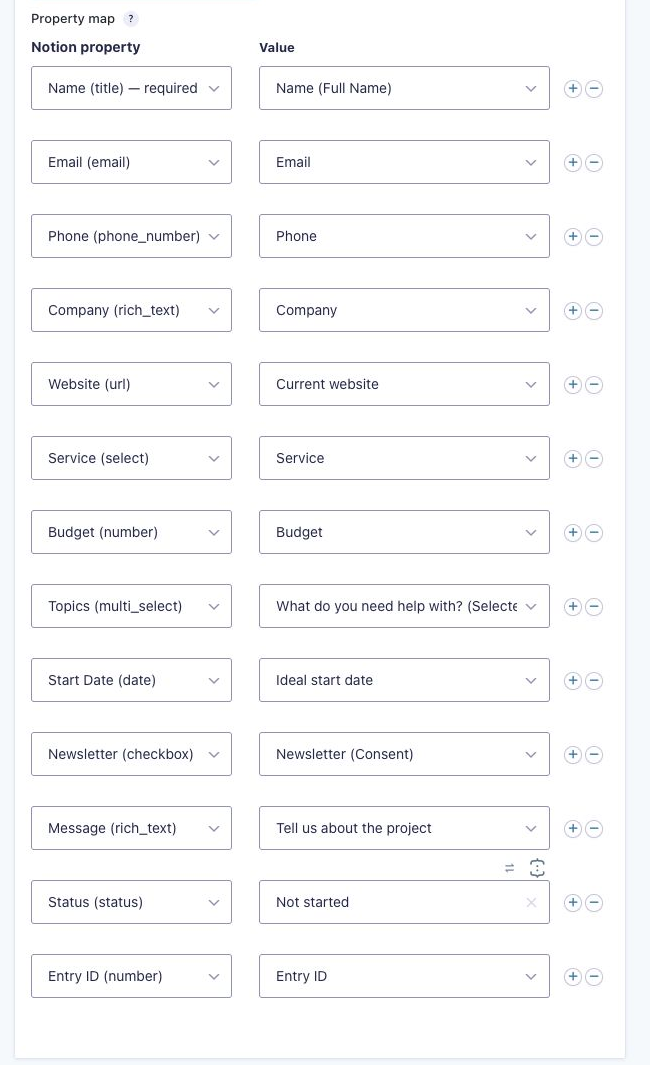
After a submission, this is what the add-on wrote to the Notion row for my test entry (I read it back from Notion to check every value):
| Notion column | Type | Form value | What Notion got |
|---|---|---|---|
| Name | Title | Maya Okafor | Maya Okafor |
| [email protected] | [email protected] | ||
| Phone | Phone | (555) 214-8890 | (555) 214-8890 |
| Service | Select | Website Design | Website Design (existing option) |
| Topics | Multi-select | Online store, Memberships | Two tags, created on the fly |
| Budget | Number | $4,500.00 | 4500 (shown as $4,500.00 with a dollar format) |
| Start Date | Date | 12/01/2026 | 2026-12-01 |
| Newsletter | Checkbox | Consent checked | Checked |
| Status | Status | Not started (custom value) | Not started |
| Entry ID | Number | 713 | 713 |
And this is the database in Notion after a few more test submissions:
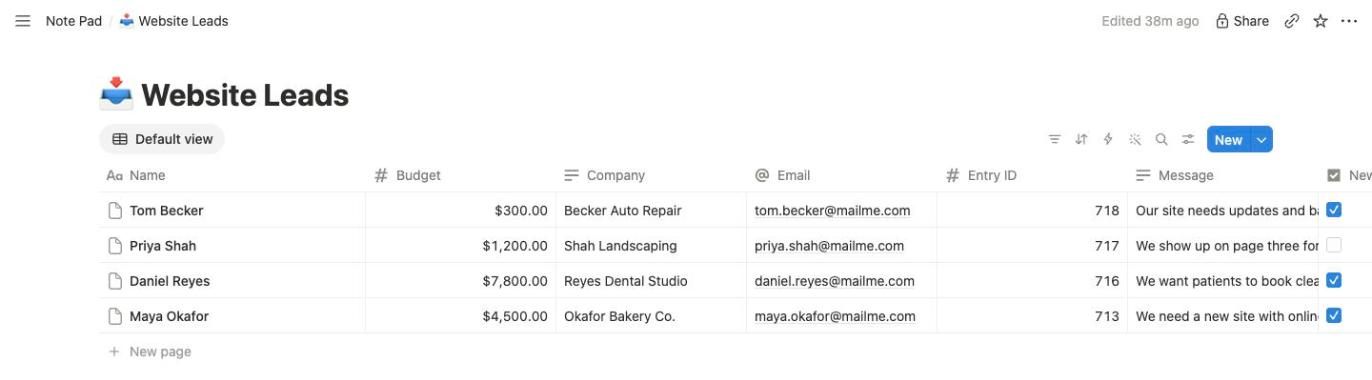
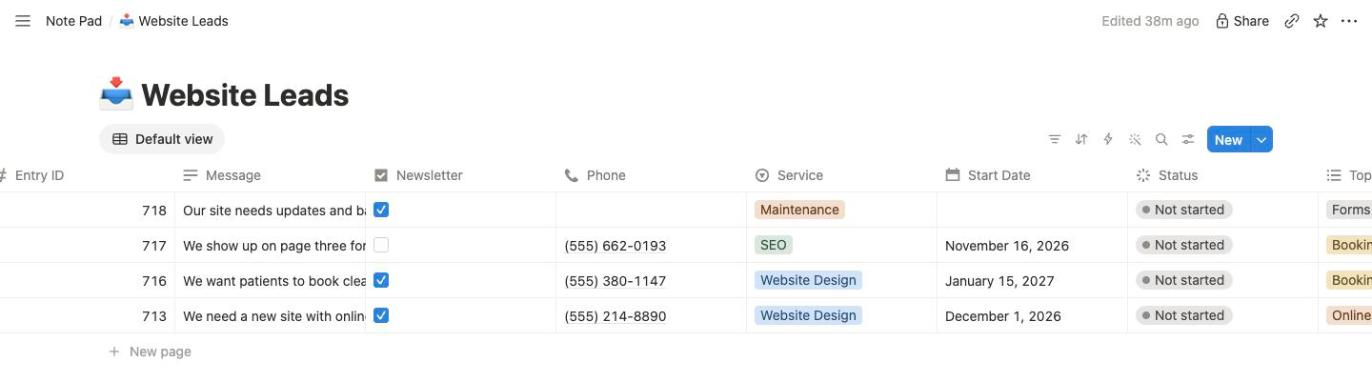
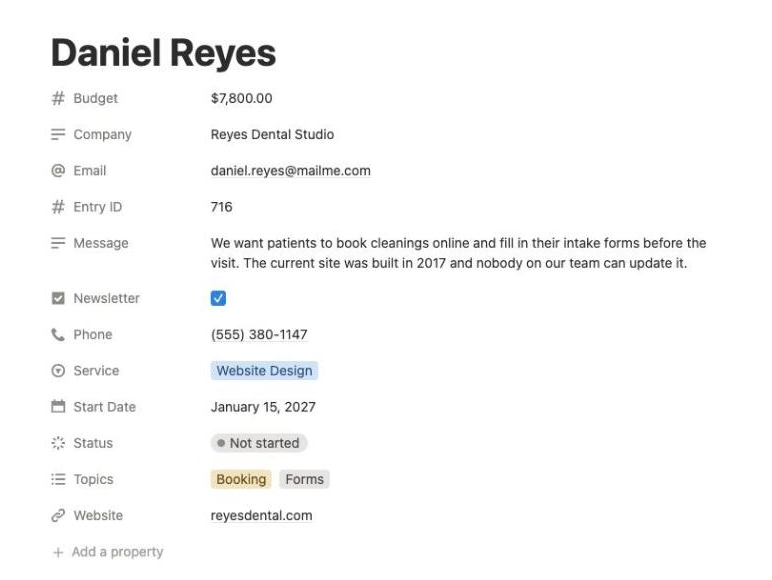
A few things worth knowing about how values are converted:
- Checkboxes in Notion are checked by values like
1,yes,trueorchecked, and unchecked by0,noorfalse. A checked Consent field sends1, so it works as is. - Multi-select values are split on commas, so a Checkbox field maps neatly. A choice that itself has a comma in it (“Booking, scheduling”) turns into two tags.
- Select options that don’t exist yet are added by Notion. Status options are not: the value has to match an existing status exactly.
- Numbers that aren’t numbers are skipped without an error, so the column just stays empty.
- Dates are sent as a date only. A time of day isn’t included.
Step 4: Create a Notion Page for Each Entry
A database row is great for a list of leads, but sometimes you want a document to work in. Add a second feed and set Destination to Child page (under a Notion page). Pick the Parent page (click Refresh pages if it’s missing), then write the Page title and Page body (markdown) with merge tags.
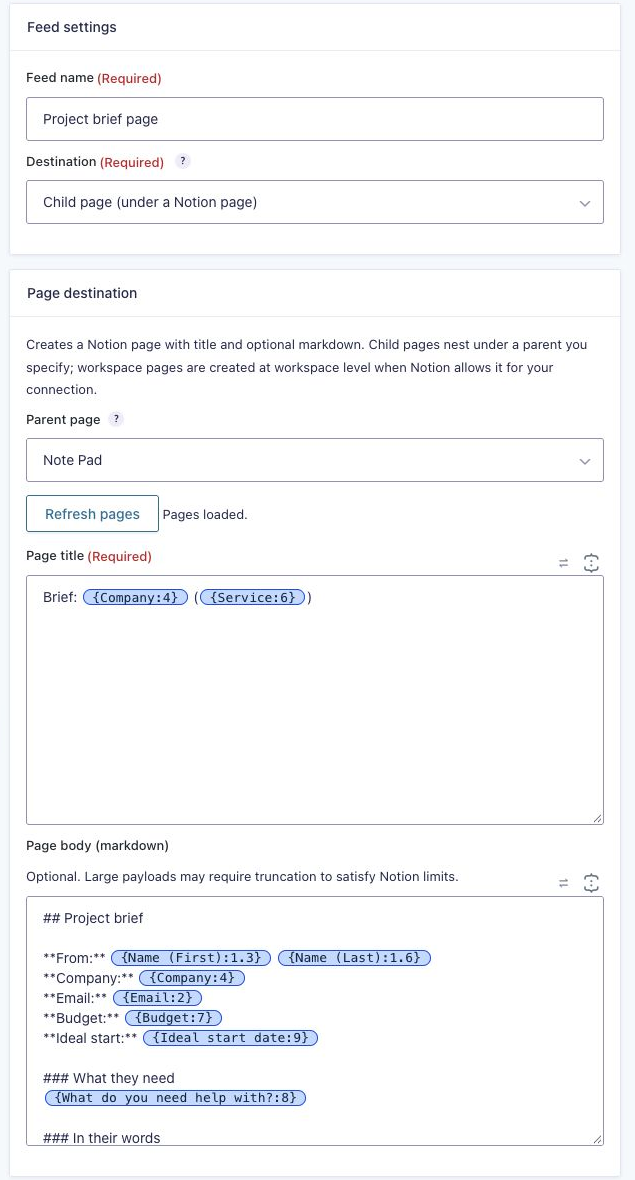
Here’s the body I used. The merge tag button inserts the field tags for you:
## Project brief

**From:** {Name (First):1.3} {Name (Last):1.6}
**Company:** {Company:4}
**Email:** {Email:2}
**Budget:** {Budget:7}
**Ideal start:** {Ideal start date:9}

### What they need
{What do you need help with?:8}

### In their words
> {Tell us about the project:11}

### Next steps
- [ ] Reply within one business day
- [ ] Book a discovery call
- [ ] Send a proposal

---
Gravity Forms entry #{entry_id} · submitted {date_mdy}
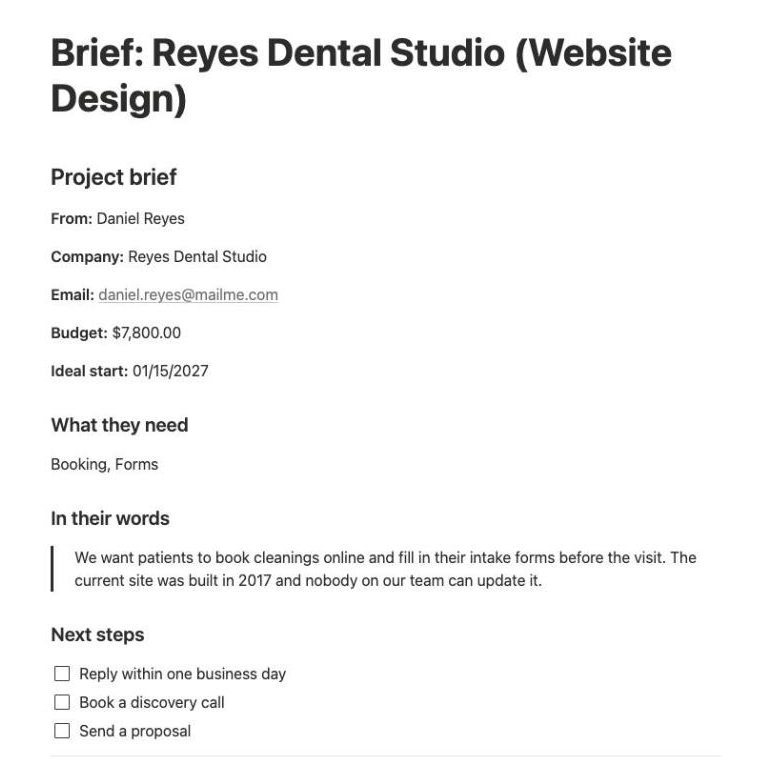
Notion turned that into a real page titled Brief: Reyes Dental Studio (Website Design) with a heading, the details in bold labels, the email as a clickable link, a quote with the visitor’s message, three to-do checkboxes and a divider. The to-do list is the part I like most: the brief arrives with the next steps already on it.
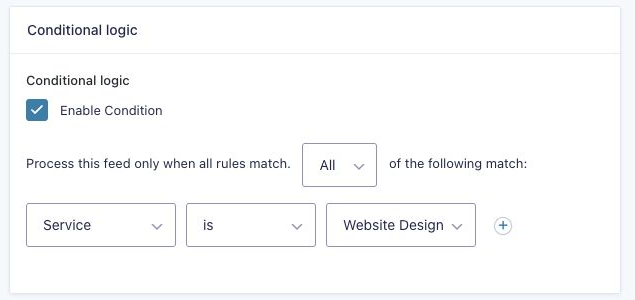
I only want a brief for design projects, so this feed has conditional logic: Service is Website Design. SEO and maintenance inquiries still go to the database, but they don’t get a page.
The third option, Workspace page, works the same way without a parent page. It created my test page at the top level of the workspace. For most sites a parent page is tidier, because everything from one form stays together.
Step 5: Check the Result From the Entry
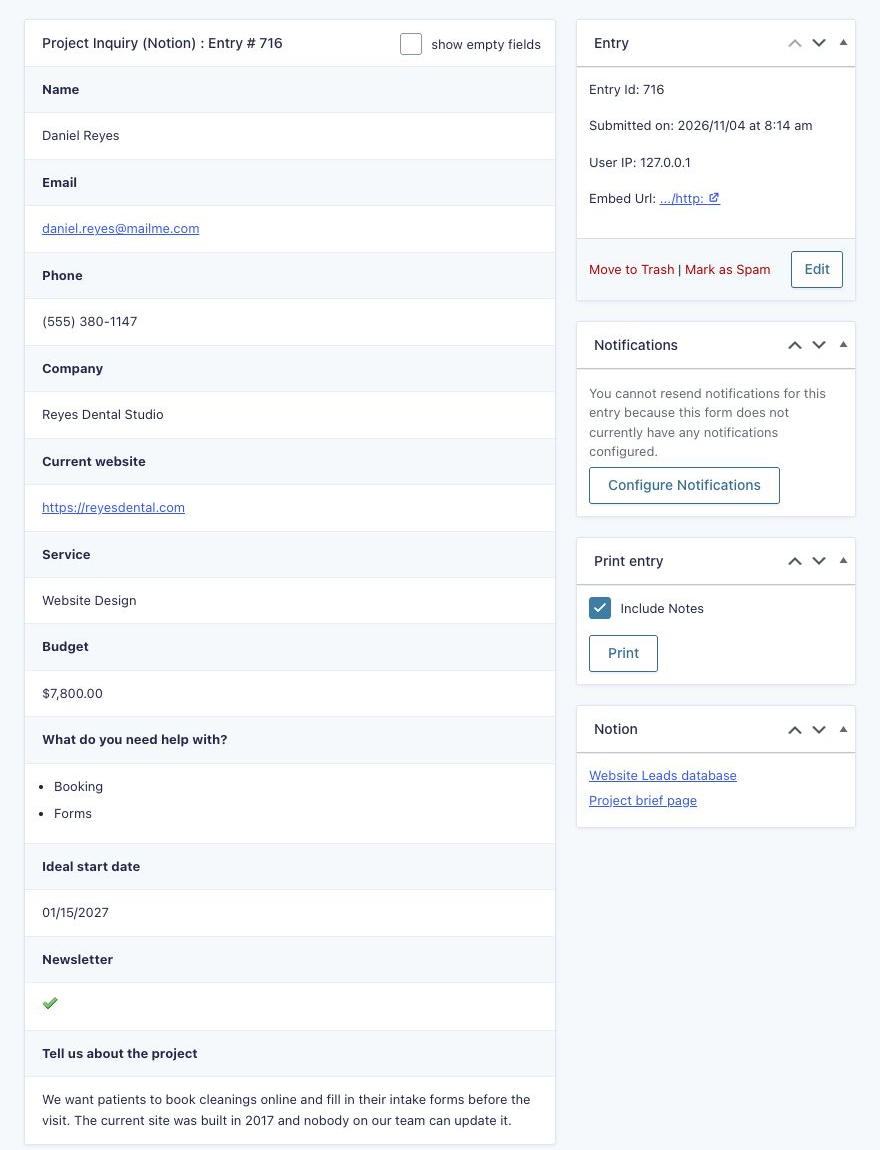
Each entry now has a Notion box in the sidebar with a link to every page or row its feeds created, named after the feed. One click takes you from the entry to the lead in Notion.
When Notion refuses something, the reason shows up as an entry note. Here I set the Status to “New lead”, which doesn’t exist in my database:
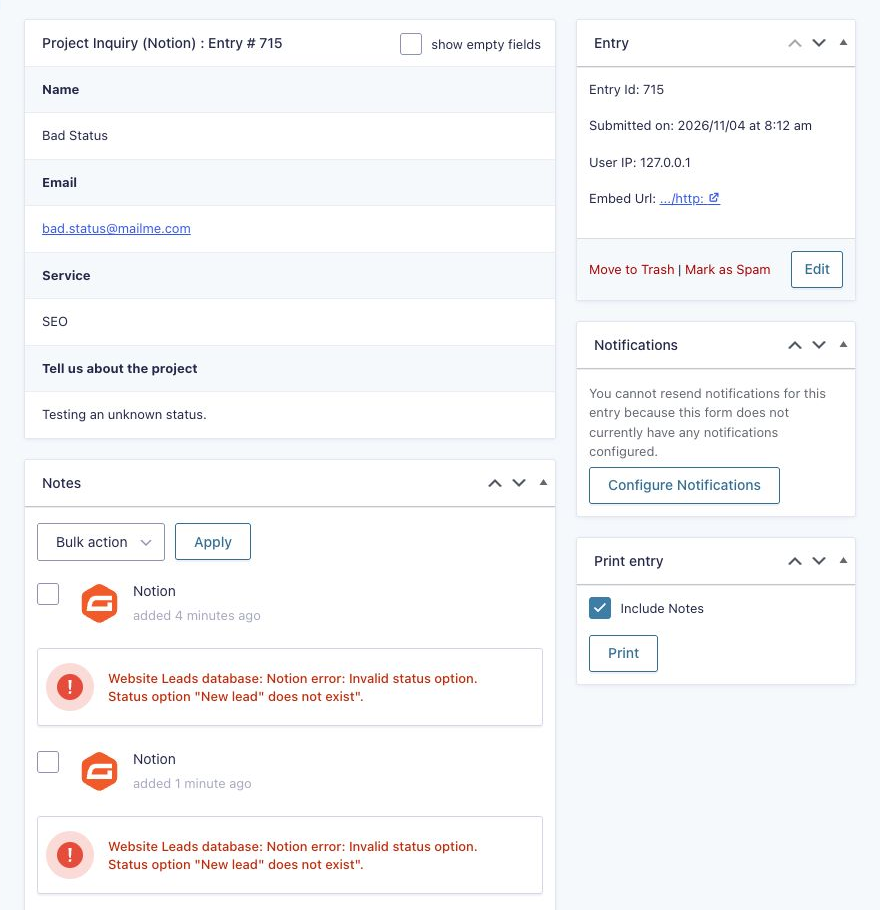
Errors like this one won’t fix themselves, so the add-on tells Gravity Forms not to retry them. Fix the feed (or add the status in Notion) for the next entries. Errors that can go away on their own, like a rate limit or Notion being briefly down, are marked as worth retrying, so Gravity Forms tries again if your site allows more than one attempt (the gform_max_async_feed_attempts filter).
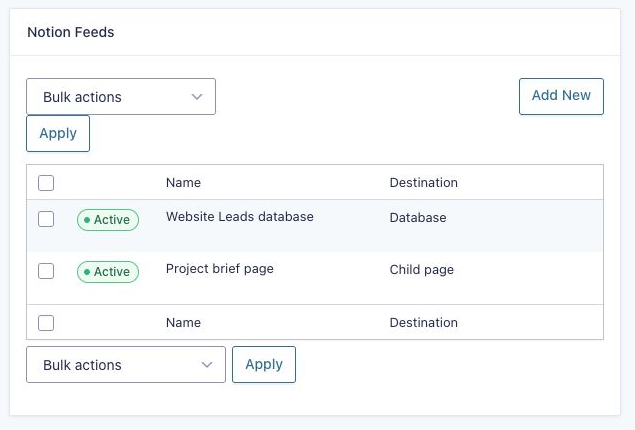
All Your Notion Feeds in One Place
The feed list shows each feed and its destination. One form can have as many feeds as you like, so you can send the same entry to a leads database, a client page and a team database at once.
For Developers
The add-on has filters for the parts you might want to change in code:
| Filter | What it does |
|---|---|
gform_notion_should_process_feed | Return false to skip a feed for an entry. |
gform_notion_feed_properties | Change the database properties before they’re sent. Useful for column types the property map doesn’t handle. |
gform_notion_feed_markdown | Change the page body before it’s sent. |
gform_notion_feed_children | Add your own Notion blocks to a new page. |
gform_notion_api_rate_limit_retries | How many times to retry when Notion rate-limits the site (up to 10). |
gform_notion_oauth_client_id / gform_notion_oauth_client_secret | Set the connection credentials in code. |
All of the feed filters also have form-specific versions, such as gform_notion_feed_properties_12 for form 12.
Things to Know
- It only creates. Each submission adds a new row or page. Editing an entry in WordPress doesn’t update Notion, and nothing comes back from Notion to Gravity Forms.
- Some column types aren’t supported in the property map: people, files, relations and rollups. Leave those columns unmapped, or set them with the
gform_notion_feed_propertiesfilter. File uploads aren’t sent to Notion. - Pages only have a title property. Child and workspace pages get a title and a body. If you need columns, use a database.
- Markdown comes from your form too. Whatever the visitor types goes into the body as markdown. A line break in the message ends a quote, so the second paragraph of my test message showed up as normal text under the quote. Someone could also type markdown links or headings into a Paragraph field. That’s fine for internal pages, but keep it in mind if you share the pages.
- Rename carefully. If you rename or delete a Notion column, click Refresh database properties and check the map. The add-on reloads the columns when the saved list doesn’t match, but a mapped column that no longer exists makes the feed fail with an error note until you fix the map.
- It’s a Labs project. The settings page says it plainly: “This is a Gravity Labs project and is not officially supported.” Test it on a staging site first.
Alternatives
- Gravity Connect Notion from Gravity Wiz is a paid add-on that also sends entries to Notion databases and can update the Notion page when an entry is edited. With Populate Anything it can also pull Notion data into a form.
- Zapier connects Gravity Forms to Notion without code, but every submission uses a task on your Zapier plan.
- The Webhooks Add-On can post to the Notion API directly if you’re comfortable building the JSON yourself and storing a token.
Who Should Use It
If you already run your business in Notion, this is the simplest way I’ve tried to get form entries there: no monthly task limits, no middle service, and the setup stays inside Gravity Forms. It’s a great fit for lead lists, client intake, job applications, content requests and bug reports, especially with a page feed that turns each submission into a working document with a to-do list.
If you need two-way sync, updates when entries are edited, or file uploads in Notion, look at the alternatives above, at least until the add-on grows those features.
Frequently Asked Questions
Does Gravity Forms integrate with Notion?
Yes. The Notion Add-On from Gravity Labs connects Gravity Forms to a Notion workspace and sends each entry to a Notion database as a new row, or creates a new Notion page for it. It is a Gravity Labs project, which means it is experimental and not officially supported.
Why doesn’t my Notion database show up in the feed settings?
The connection can only see pages and databases that were shared with it. Share the database (or the page it lives on) with your connection in Notion, then click Refresh databases in the feed.
Can I send a Gravity Forms checkbox field to a Notion multi-select?
Yes. Map the checkbox field to the multi-select column. The checked choices are sent as separate tags, and tags that don’t exist yet are created. Choices that contain a comma are split into two tags.
Does editing an entry update the Notion page?
No. The add-on creates a new row or page when the feed runs and doesn’t update it later. Nothing syncs back from Notion to Gravity Forms either.
Why did my entry get a “Status option does not exist” note?
Notion status columns only accept statuses that already exist in the database. Change the value in the feed to an existing status, or add that status in Notion. The note tells you exactly which value was rejected.
Need More Help?
If you still need help, use the chat or leave a comment below and we’ll get back to you.
Comments