
The Problem
You want a survey that feels like SurveyMonkey or Typeform: one question on the screen at a time, star ratings, a 0 to 10 “would you recommend us” scale, a grid of satisfaction ratings, a progress bar, and charts of the answers when the responses come in.
A normal Gravity Forms form shows every question at once, and the standard fields don’t include ratings, Likert grids or ranking. So it looks like a contact form, not a survey.
The Solution
Use two official add-ons together. The Survey Add-On gives you the survey questions (Likert, Rating, Rank and more) and a Survey Results report. The Conversational Forms Add-On turns the same form into a full-screen page that shows one question at a time, with a welcome screen and a progress bar.
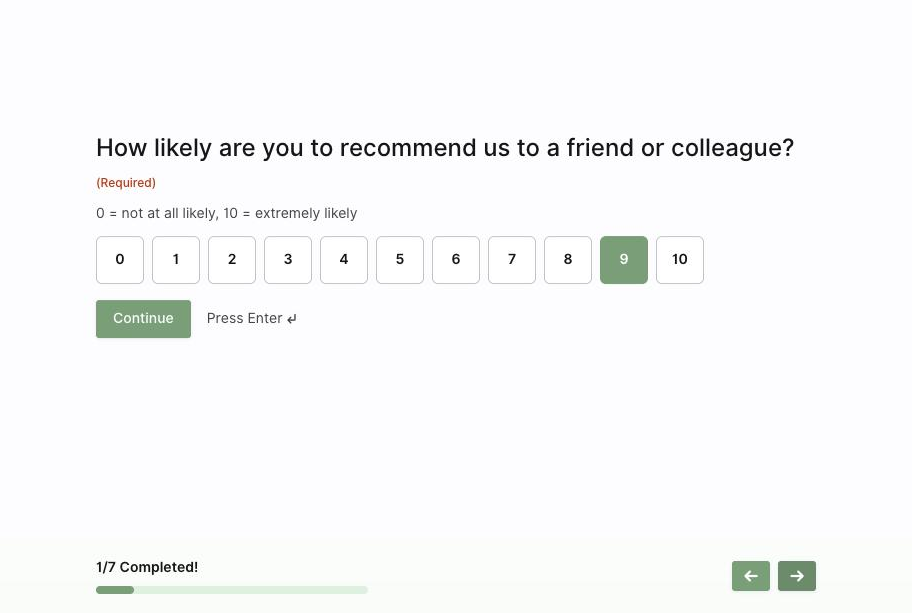
Here’s what we’ll build, tested on Gravity Forms 3.2 with Survey 4.2.3 and Conversational Forms 1.8.0:
| Question | Field | Survey Field Type |
|---|---|---|
| How would you rate your overall experience with us? | Survey | Rating (stars) |
| How likely are you to recommend us to a friend or colleague? | Survey | Radio Buttons (0 to 10) |
| How satisfied are you with each of these? | Survey | Likert, multiple rows, scoring on |
| What matters most to you when you buy from us? | Survey | Rank |
| How did you hear about us? | Survey | Checkboxes |
| What is one thing we could do better? | Survey | Paragraph Text |
| Want us to follow up? (optional) | (standard field) |
What You Need
- A Gravity Forms Elite license. Both the Survey and Conversational Forms add-ons are Elite add-ons (see Gravity Forms pricing).
- Gravity Forms 3.0 or later, which Conversational Forms requires.
Step 1: Install the Two Add-Ons
Go to Forms → Add-Ons. With your Elite license key saved under Forms → Settings, you’ll see an Install button on the Survey Add-On and Conversational Forms Add-On cards. Install both, then activate them on the Plugins page (or from the same Add-Ons screen).
Step 2: Add Your Survey Questions
Create a new form and add a Survey field (under Advanced Fields) for each question. Every survey question is its own Survey field.
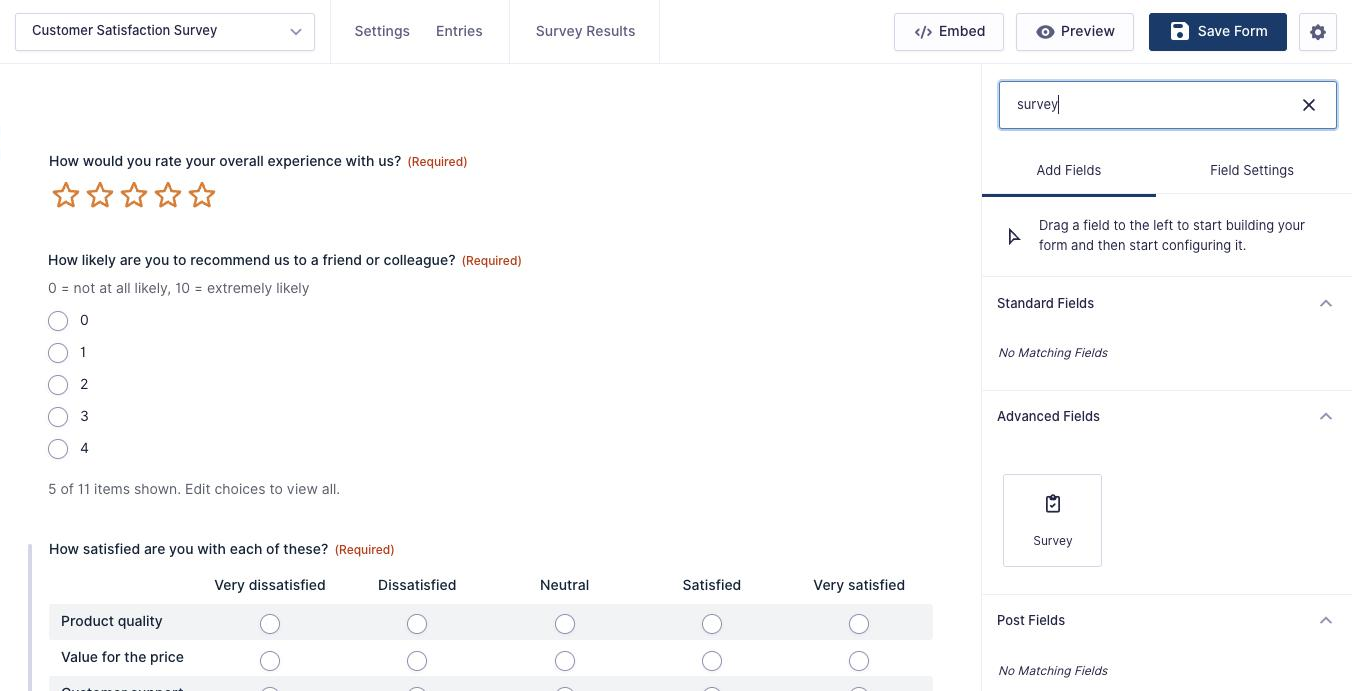
Type the question into Survey Question, then pick a Survey Field Type: Likert, Rank, Rating, Radio Buttons, Checkboxes, Single Line Text, Paragraph Text or Drop Down. The type locks once the form has entries, so choose before you go live.
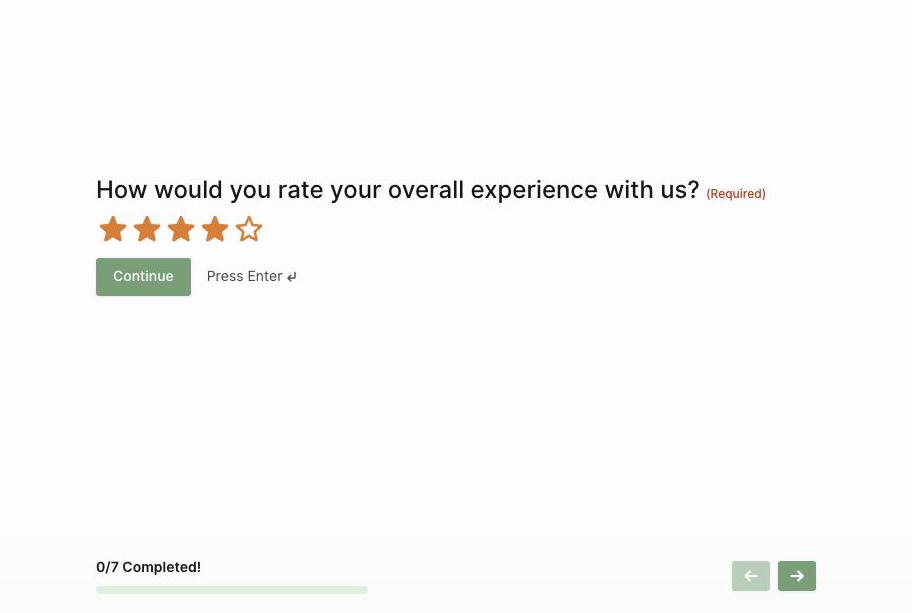
Rating: The Star Question
Set the Survey Field Type to Rating and enter one choice per star, from worst to best. We used Terrible, Not so good, Okay, Pretty good and Excellent. Visitors see stars, and the choice text shows as a tooltip and in the results.
Likert: The Satisfaction Grid
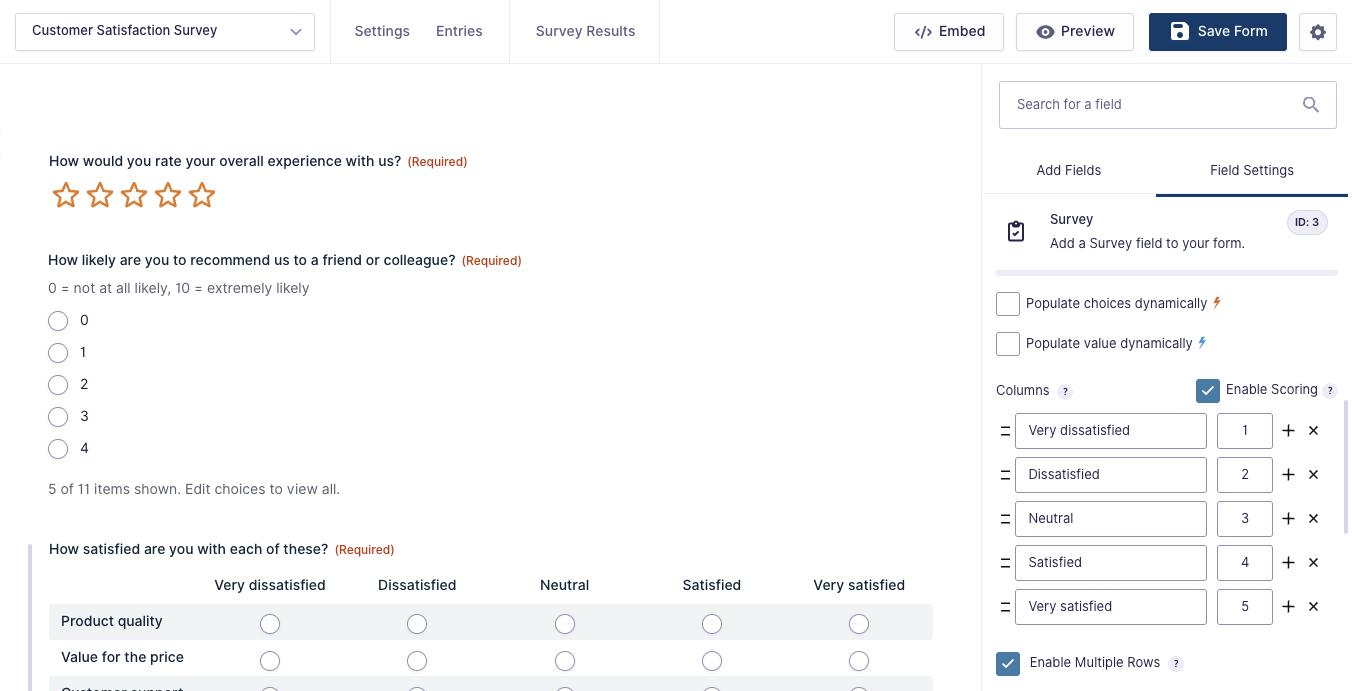
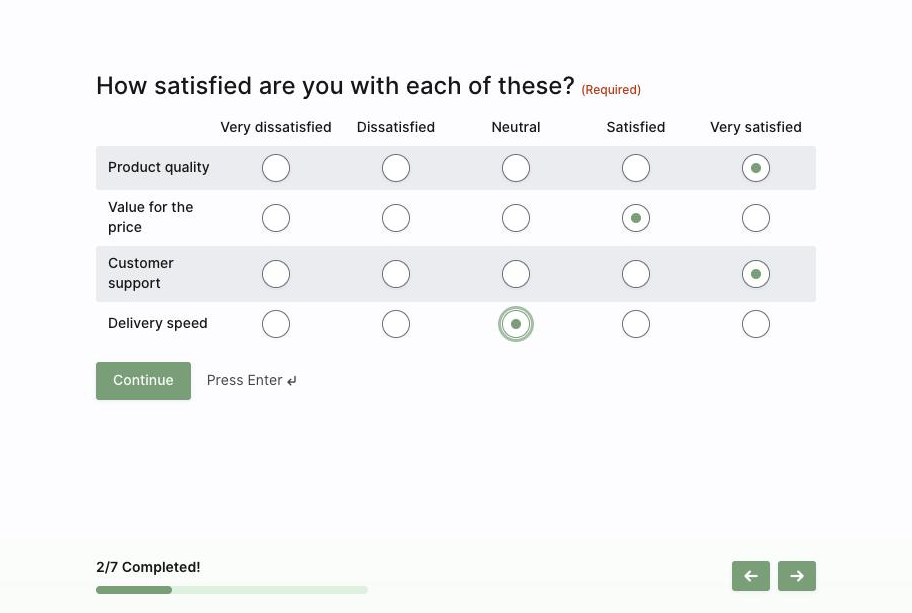
Set the type to Likert. The Columns are the answer scale (Very dissatisfied to Very satisfied). Tick Enable Multiple Rows to ask about several things on one grid, then add a row for each (Product quality, Value for the price, Customer support, Delivery speed).
Tick Enable Scoring to give each column a score, 1 to 5 here. Gravity Forms then shows an average score for every row in the results, and you can put the total in notifications with the {survey_total_score} merge tag.
Rank: Drag Into Order
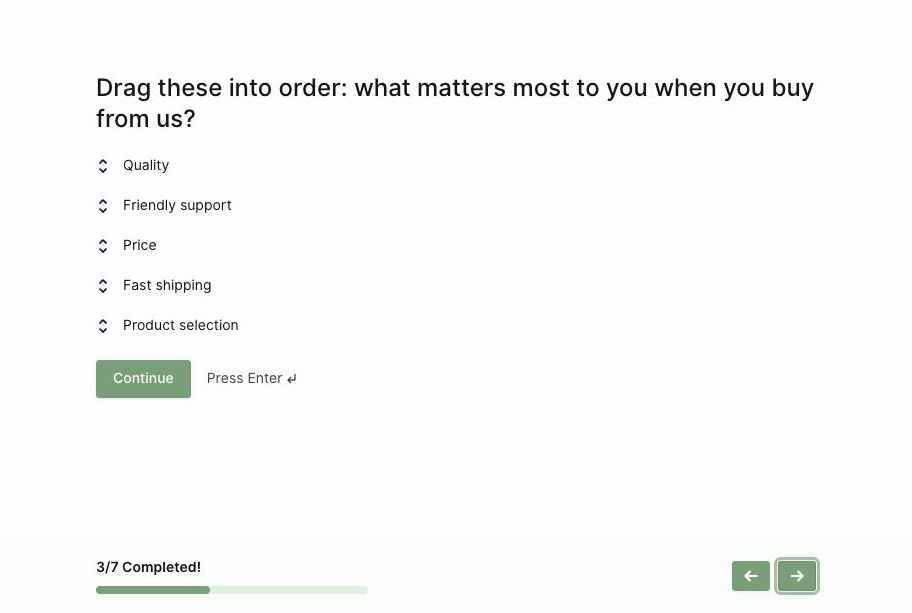
Set the type to Rank and list the items. Visitors drag them into order, and the results add up a score and an overall rank for each item.
The 0 to 10 “Would You Recommend Us?” Question
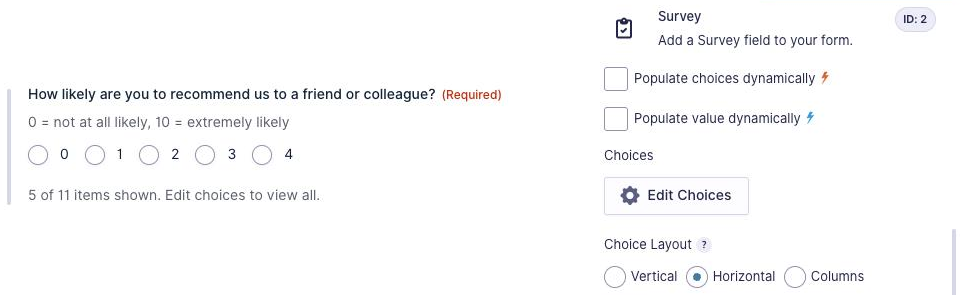
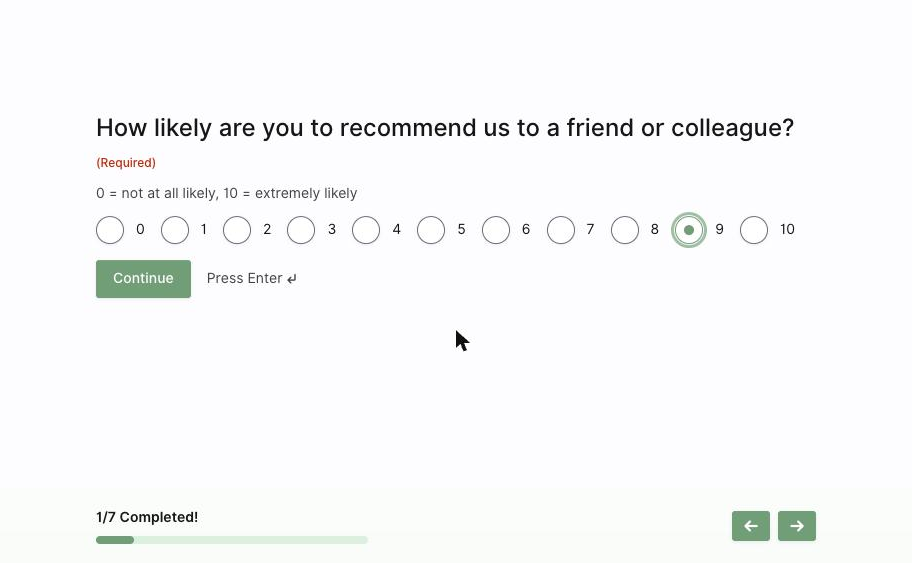
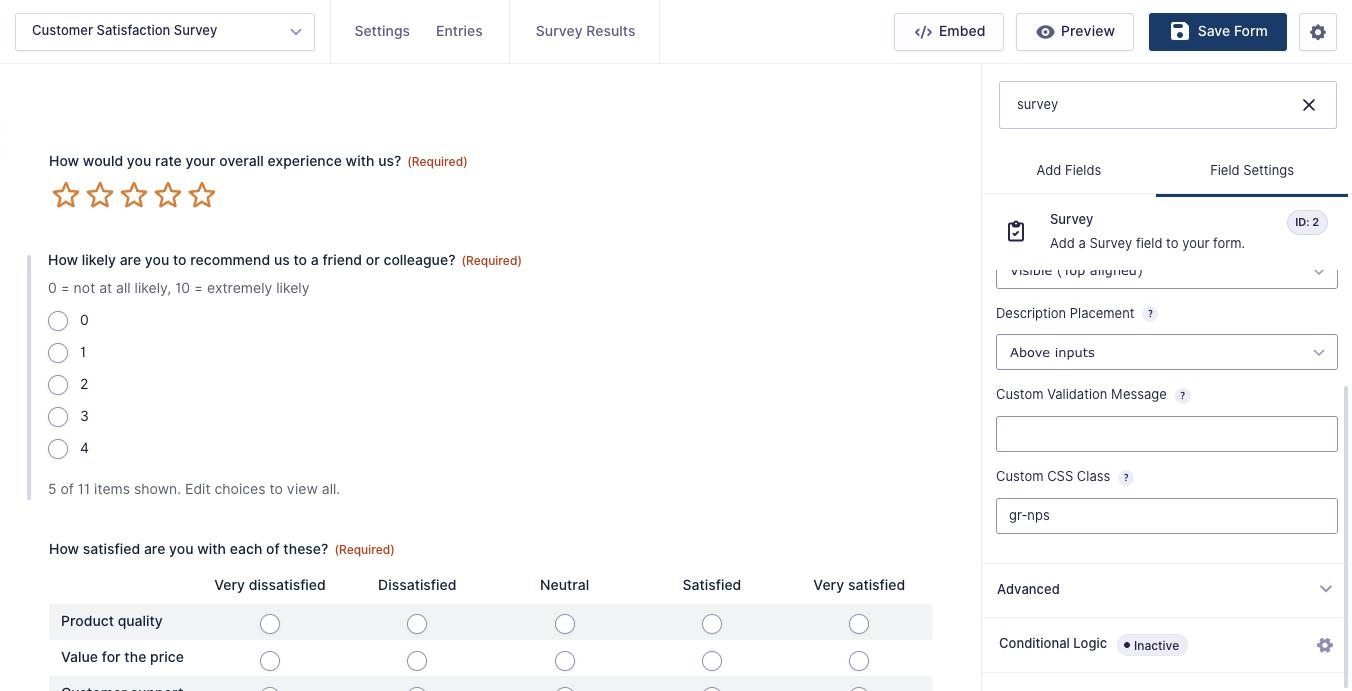
Survey has no dedicated Net Promoter Score field, so use the Radio Buttons survey type with eleven choices, 0 to 10, and put “0 = not at all likely, 10 = extremely likely” in the description.
By default the eleven choices stack in a long column. To put them in a row, open the field’s settings and set Choice Layout to Horizontal. It’s built into Gravity Forms (Radio Buttons and Checkboxes have it too), and it works on the conversational page.
Optional: Make the Scale Look Like Buttons
Survey tools usually show this question as a row of numbered buttons. If you want that look, give the field the Custom CSS Class gr-nps (on the Appearance tab) and add this styling snippet with WPCode, Code Snippets or your child theme’s functions.php. It only changes how the choices look; the layout still comes from Choice Layout.
// Style a radio field with the CSS class gr-nps as a row of numbered buttons.
// Set the field's Choice Layout to Horizontal first; this only changes the look.
add_filter( 'gform_get_form_filter', function ( $html, $form ) {
	$has_nps = false;
	foreach ( $form['fields'] as $field ) {
		if ( strpos( (string) $field->cssClass, 'gr-nps' ) !== false ) {
			$has_nps = true;
			break;
		}
	}
	if ( ! $has_nps ) {
		return $html;
	}
	$css = '<style>
.gform_wrapper .gr-nps .gfield_radio {
	gap: 8px;
}
.gform_wrapper .gr-nps .gchoice {
	position: relative;
	margin: 0!important;
}
.gform_wrapper .gr-nps .gchoice input {
	position: absolute;
	opacity: 0;
	inset: 0;
	width: 100%!important;
	height: 100%!important;
	margin: 0!important;
	cursor: pointer;
	z-index: 1;
}
.gform_wrapper .gr-nps .gchoice label {
	display: flex!important;
	align-items: center;
	justify-content: center;
	width: 48px;
	height: 48px;
	margin: 0!important;
	padding: 0!important;
	border: 1px solid #c3c4c7;
	border-radius: 6px;
	font-weight: 600;
	background: #fff;
	max-width: none!important;
}
.gform_wrapper .gr-nps .gchoice label::before,
.gform_wrapper .gr-nps .gchoice label::after {
	display: none!important;
}
.gform_wrapper .gr-nps .gchoice input:checked+label {
	background: var(--gf-color-primary,#204ce5);
	border-color: var(--gf-color-primary,#204ce5);
	color: #fff;
}
.gform_wrapper .gr-nps .gchoice input:focus-visible+label {
	outline: 2px solid var(--gf-color-primary,#204ce5);
	outline-offset: 2px;
}
@media (max-width: 480px) {
	.gform_wrapper .gr-nps .gchoice label { width: 40px; height: 40px; }
}
</style>';
	return $css . $html;
}, 10, 2 );
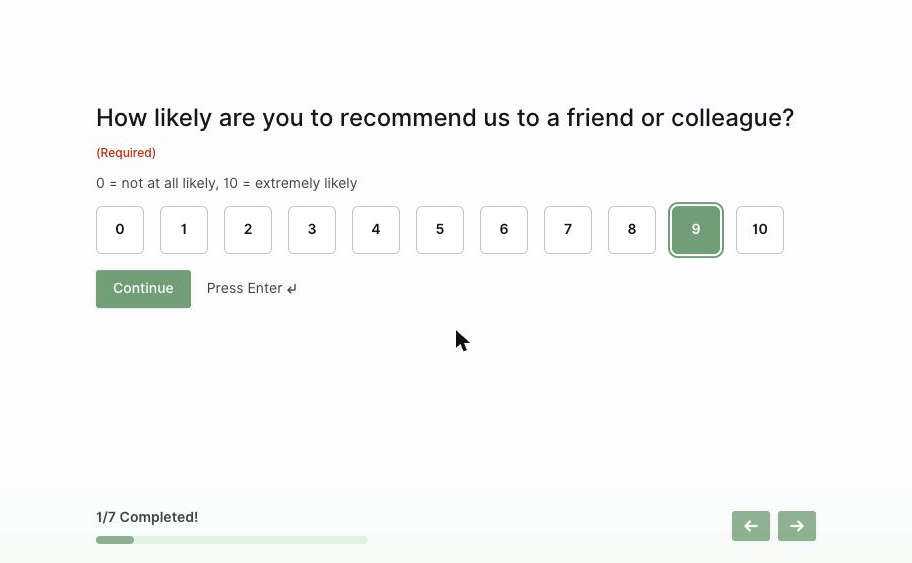
The snippet only loads its CSS on forms that use the gr-nps class, wherever the form appears, including the conversational page. The radio circles are hidden, and the selected number fills with your accent color so people can see what they picked.
Finish the form with a Checkboxes survey question, a Paragraph Text one, and an optional Email field if you want people to be able to ask for a reply. Set your thank-you message under Settings → Confirmations, as normal.
Step 3: Turn On Conversational Mode
Open the form’s Settings → Conversational Forms and turn on Enable Conversational Page. Set the Conversational Page Title and save once. After that first save you can edit the Conversational Page URL, which is the link you’ll share.
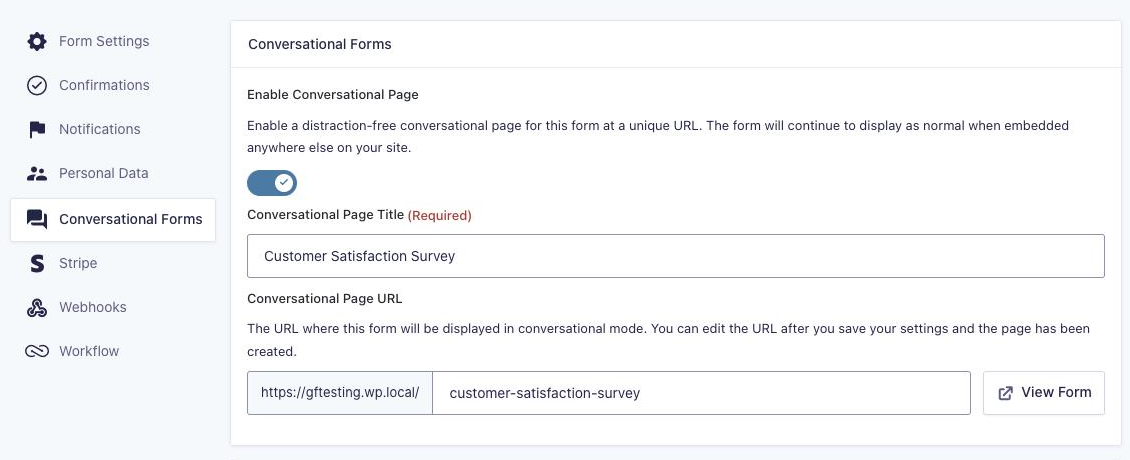
Everything is set per form; there are no global Conversational Forms settings. The useful ones for a survey:
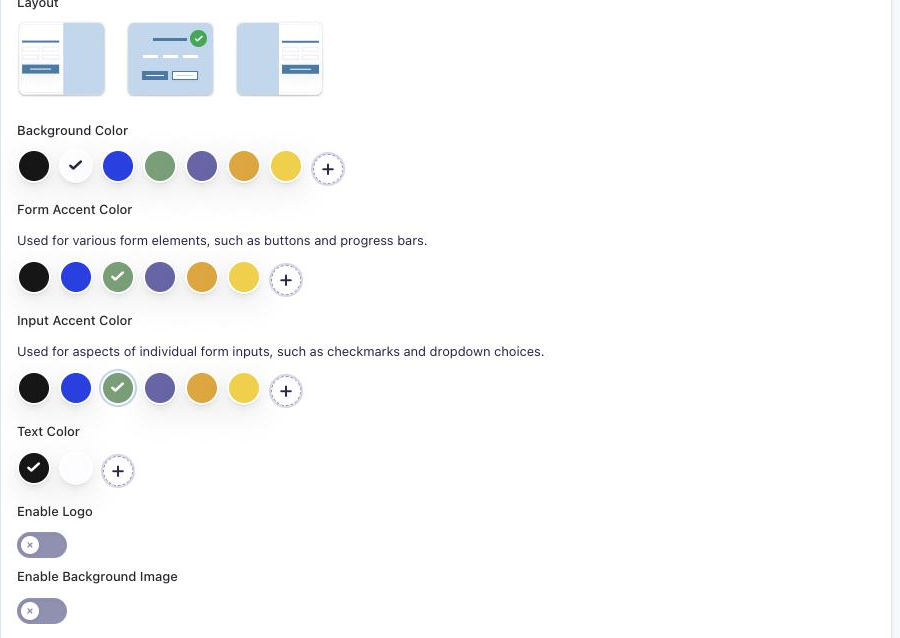
- Form Design: pick a layout, background color, Form Accent Color (buttons and progress bar) and Input Accent Color (radio dots, checkmarks). You can add a logo and a background image too.
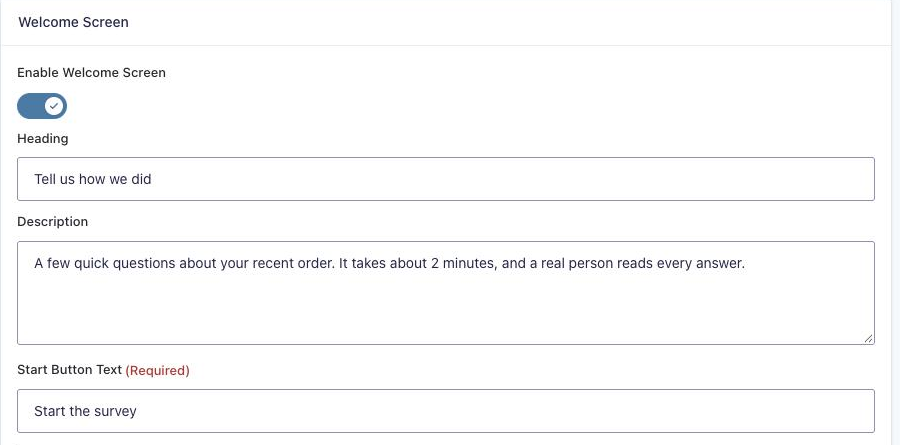
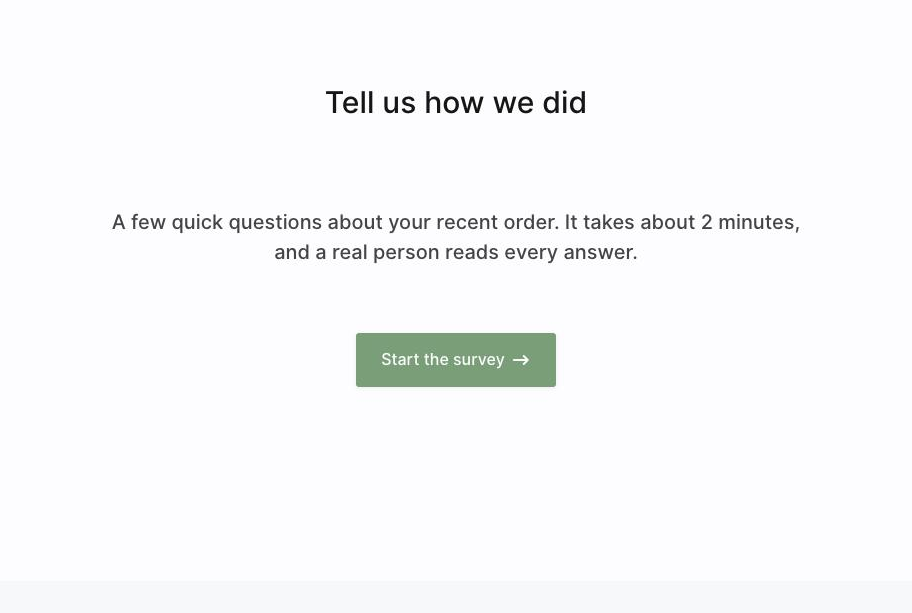
- Welcome Screen: a heading, a short description, the Start Button Text and an optional image, shown before the first question. Tell people how long it takes.
- Buttons: the Continue Button Text under each question. The last question uses your form’s submit button text.
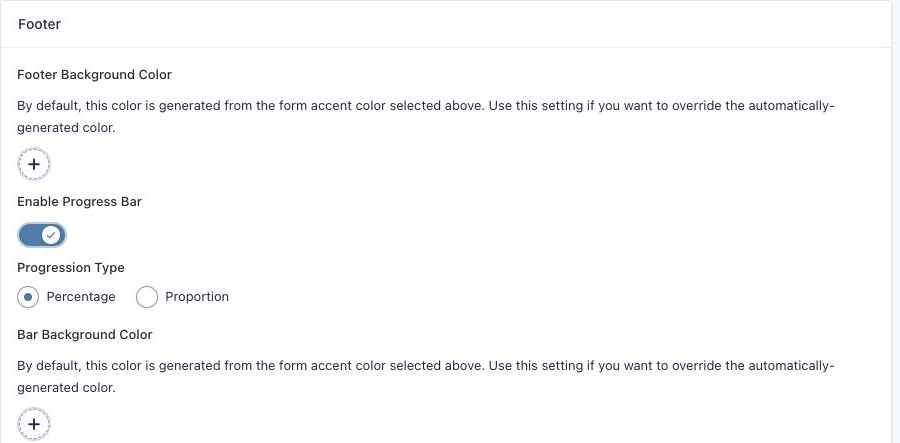
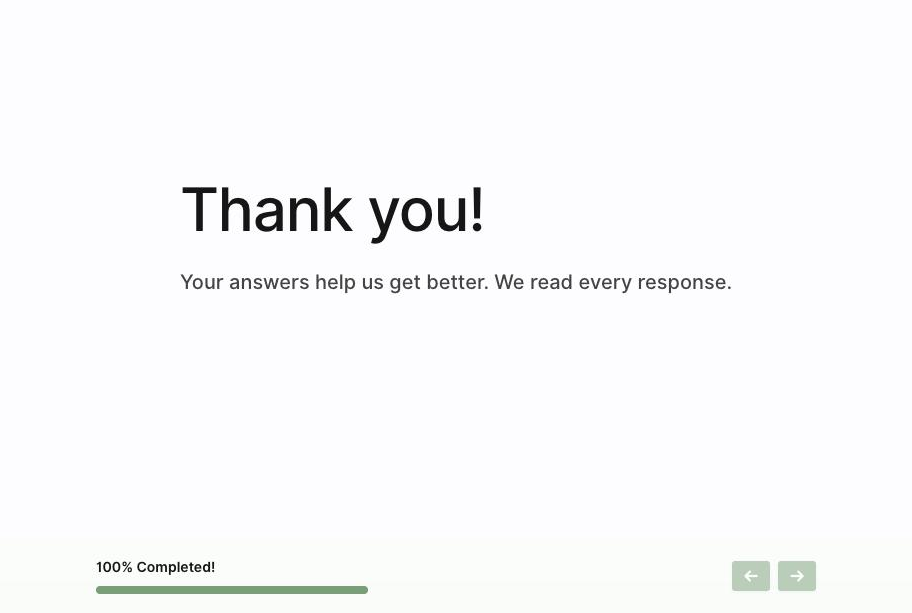
- Footer: turn on Enable Progress Bar and choose a Progression Type: Percentage, or Proportion (“2/7 Completed!”).
Step 4: Share the Survey Link
Click View Form next to the URL to open it. Visitors land on the welcome screen, answer one question at a time with Continue, the Enter key or the arrows in the footer, and finish on your confirmation message.
Share that link anywhere: an email after an order, a QR code on a receipt, a button on your site. If you also embed the same form on a normal page with the block or shortcode, it shows there as a regular form with every question at once. Only the conversational URL gets the one-at-a-time view.
Step 5: Read the Results
Go to Forms → Entries and open the Survey Results tab (or Results → Survey Results if another add-on also adds results). Each question gets a chart or table, and you can filter by date or by answers to other questions. We loaded 25 test responses:
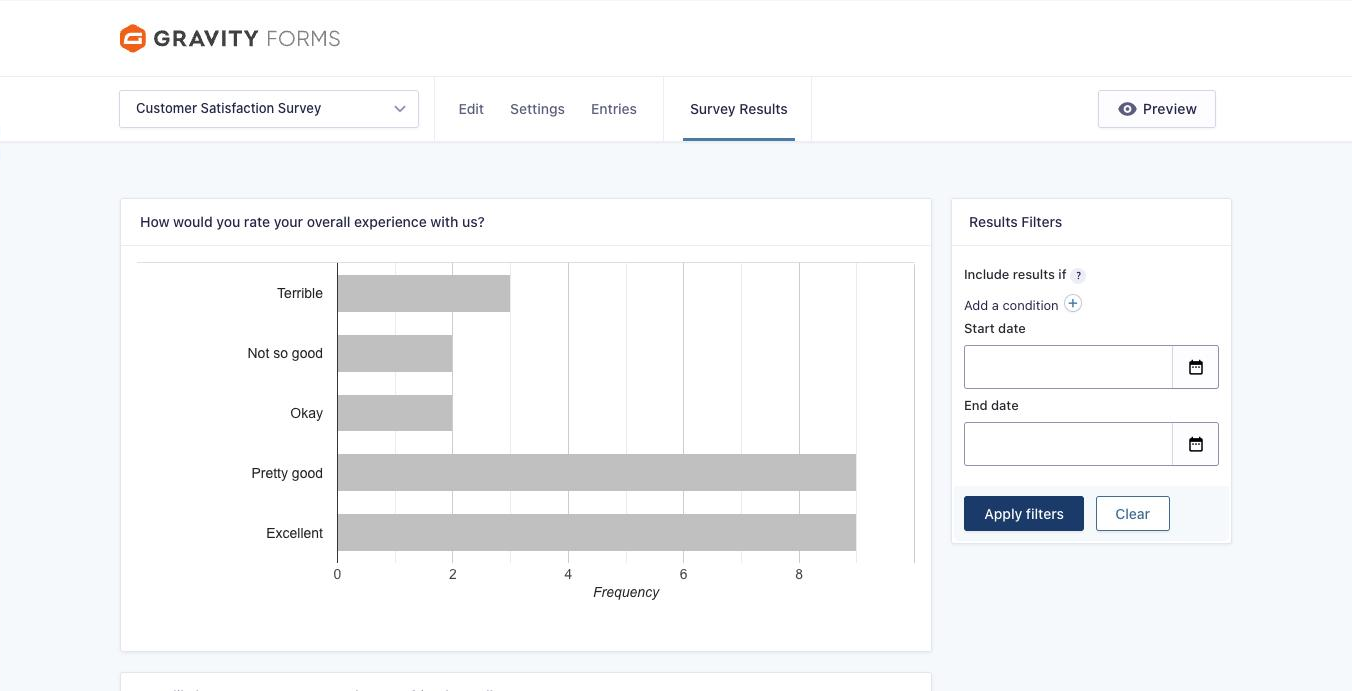
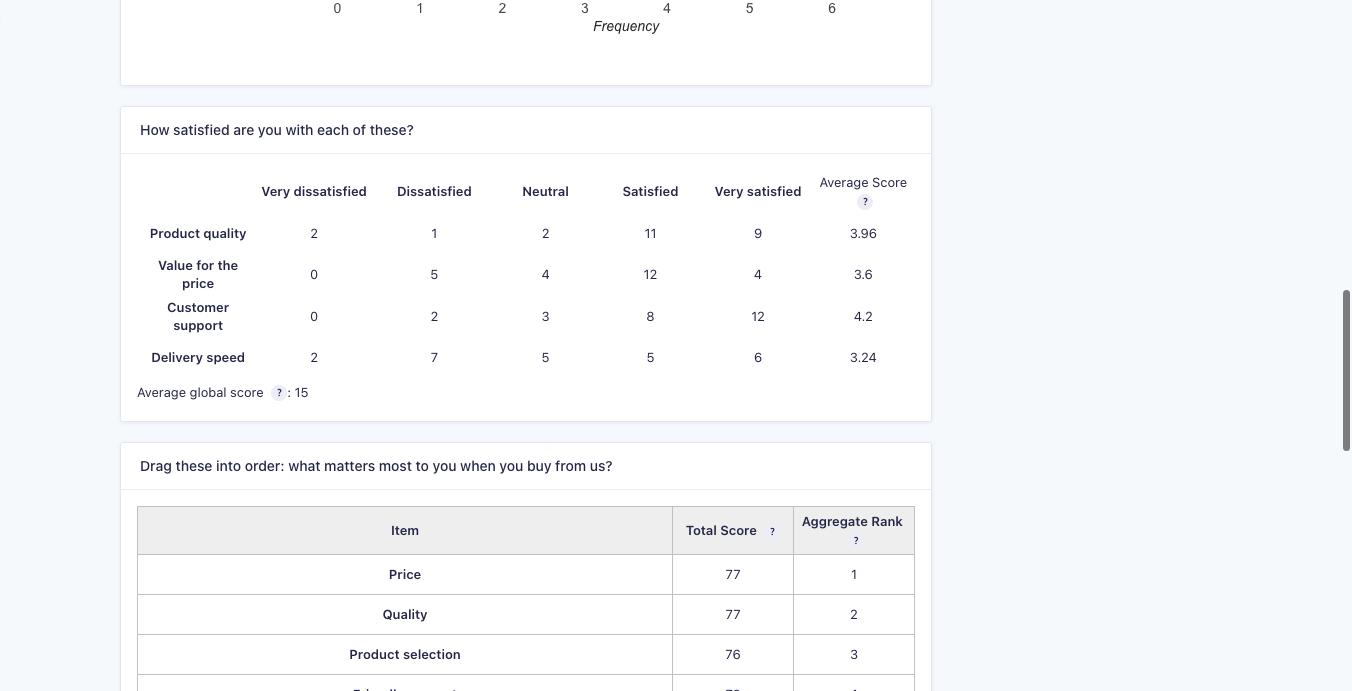
Every response is also a normal Gravity Forms entry, so you can export it, send it to a spreadsheet, or use the answers in notifications. Use {survey_total_score} for the total Likert score and {score:id=3} for the score of one Likert field.
Download the Form Template
It’s free. Get the survey from this tutorial as a Gravity Forms import file, ready to customize.
Things to Know
- No CAPTCHA field. The Conversational Forms docs list the CAPTCHA field (including invisible reCAPTCHA and Turnstile placed as a field) as unsupported, so lean on the honeypot and an anti-spam add-on like Akismet instead.
- The form title and description don’t show on the conversational page. Use the welcome screen for that.
- Labels are always on top, and CSS Ready Classes (like two columns) don’t apply in conversational mode.
- Continue doesn’t save a partial entry. If you use Partial Entries, only the Next and Previous buttons of a normal multi-page form update it.
- Google Analytics: moving between questions doesn’t fire a pagination event.
- Keep it anonymous if you promise it is. Leave out name and email fields, and turn on “Prevent the storage of IP addresses during form submission” under the form’s Settings → Personal Data.
- Don’t test with an @example.com address. Gravity Forms’ email validation rejects that domain, so use a made-up address on another domain when you test.
Frequently Asked Questions
Can Gravity Forms make surveys like SurveyMonkey?
Yes. The Survey Add-On adds Likert, Rating and Rank questions plus a Survey Results report with charts, and the Conversational Forms Add-On shows the survey one question at a time on its own full-screen page with a welcome screen and progress bar. Both are included with a Gravity Forms Elite license.
Which Gravity Forms license do I need for surveys?
Elite. The Survey Add-On and the Conversational Forms Add-On are both Elite-only official add-ons, and you install them from Forms → Add-Ons once your Elite license key is saved.
Can I show one question at a time without Conversational Forms?
Yes, with a normal multi-page form that has one question per page, a progress bar and a Next button. It works on any license but feels less like a survey app. Conversational Forms adds the full-screen layout, a welcome screen and Enter-key navigation.
Does Gravity Forms have a Net Promoter Score (NPS) field?
Not a dedicated one. Use a Survey field with the Radio Buttons type and eleven choices from 0 to 10. Gravity Forms charts the answers in Survey Results, and a small CSS snippet can show the choices as a row of buttons.
Where do I see survey results in Gravity Forms?
Go to Forms → Entries and open the Survey Results tab. It shows a chart or table for every survey question, average scores for scored Likert fields, and aggregate ranks for Rank fields, and you can filter by date or by other answers.
Related Articles
- Gravity Forms Conversational Forms Add-On
- A/B Split Test Conversational Forms vs Normal Forms in Gravity Forms
- MultiPagePro Review: Auto-Advance That Actually Works
- Gravity Forms Pricing: Basic vs Pro vs Elite
Need More Help?
If you still need help, use the chat or leave a comment below and we’ll get back to you.
Comments